

How To Set Up Blink Video Doorbell
Using the Blink Video Doorbell with a Sync Module
The Sync Module handles a large amount of communications between the Blink servers and your doorbell. When the doorbell and Sync Module are connected, battery life is improved to 2 years with normal use, and other features become available.
When your doorbell is non continued to a Sync Module, or compatible powered wiring, it operates in Issue Response style.
Click the post-obit section for more information.
Event Response
Result Response mode starts automatically when the doorbell has no Sync Module connected and powered wiring is non compatible. When the doorbell is connected to a Sync Module system, or to compatible powered wiring, the doorbell exits Result Response.
In Outcome Response mode, the Blink Video Doorbell powers all of information technology's ain communications, and batteries bleed faster than if the doorbell is connected to a Blink Sync Module or powered wiring from a chime organization you already have.
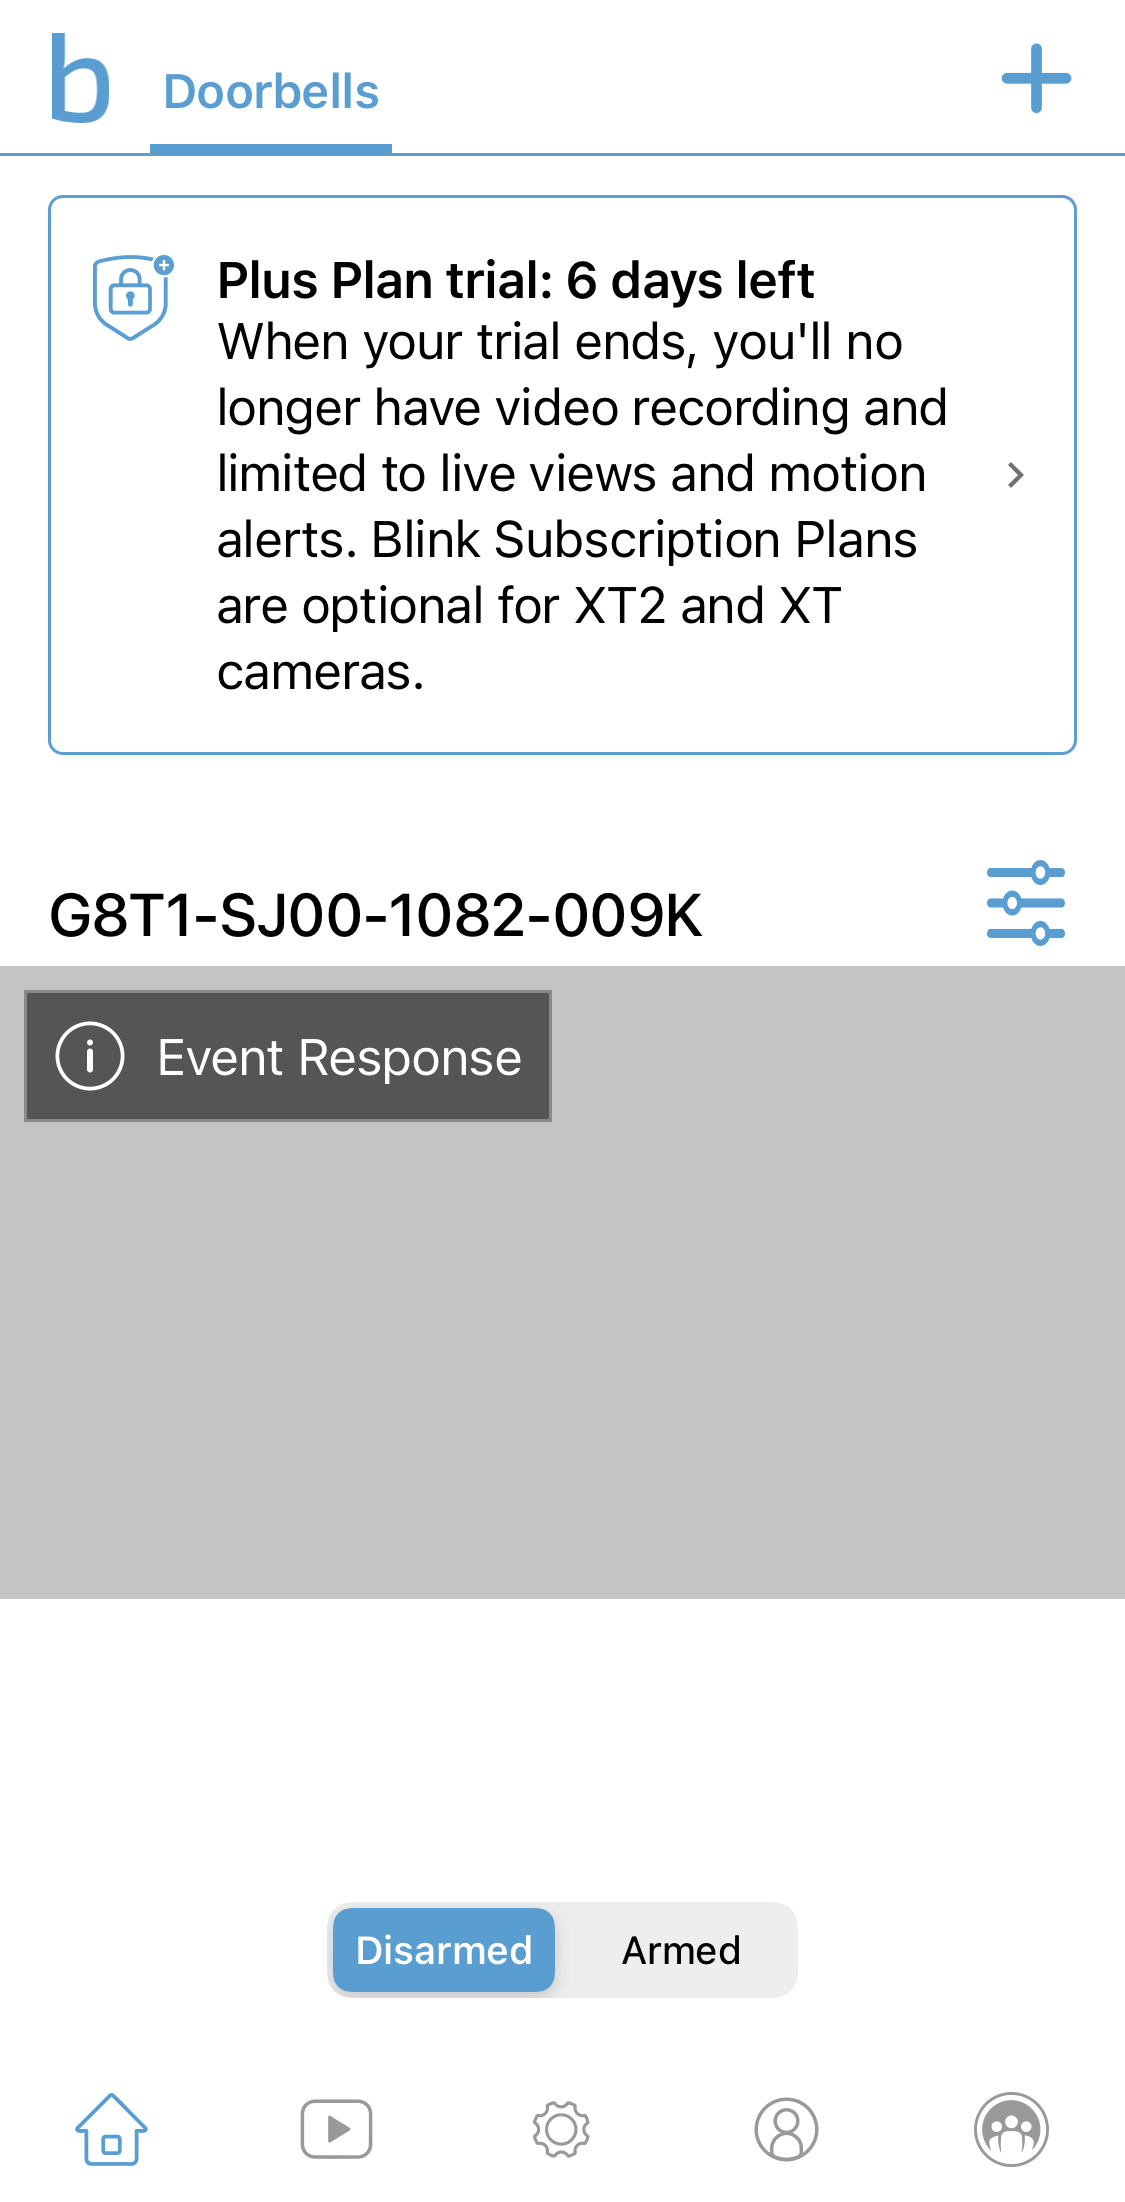
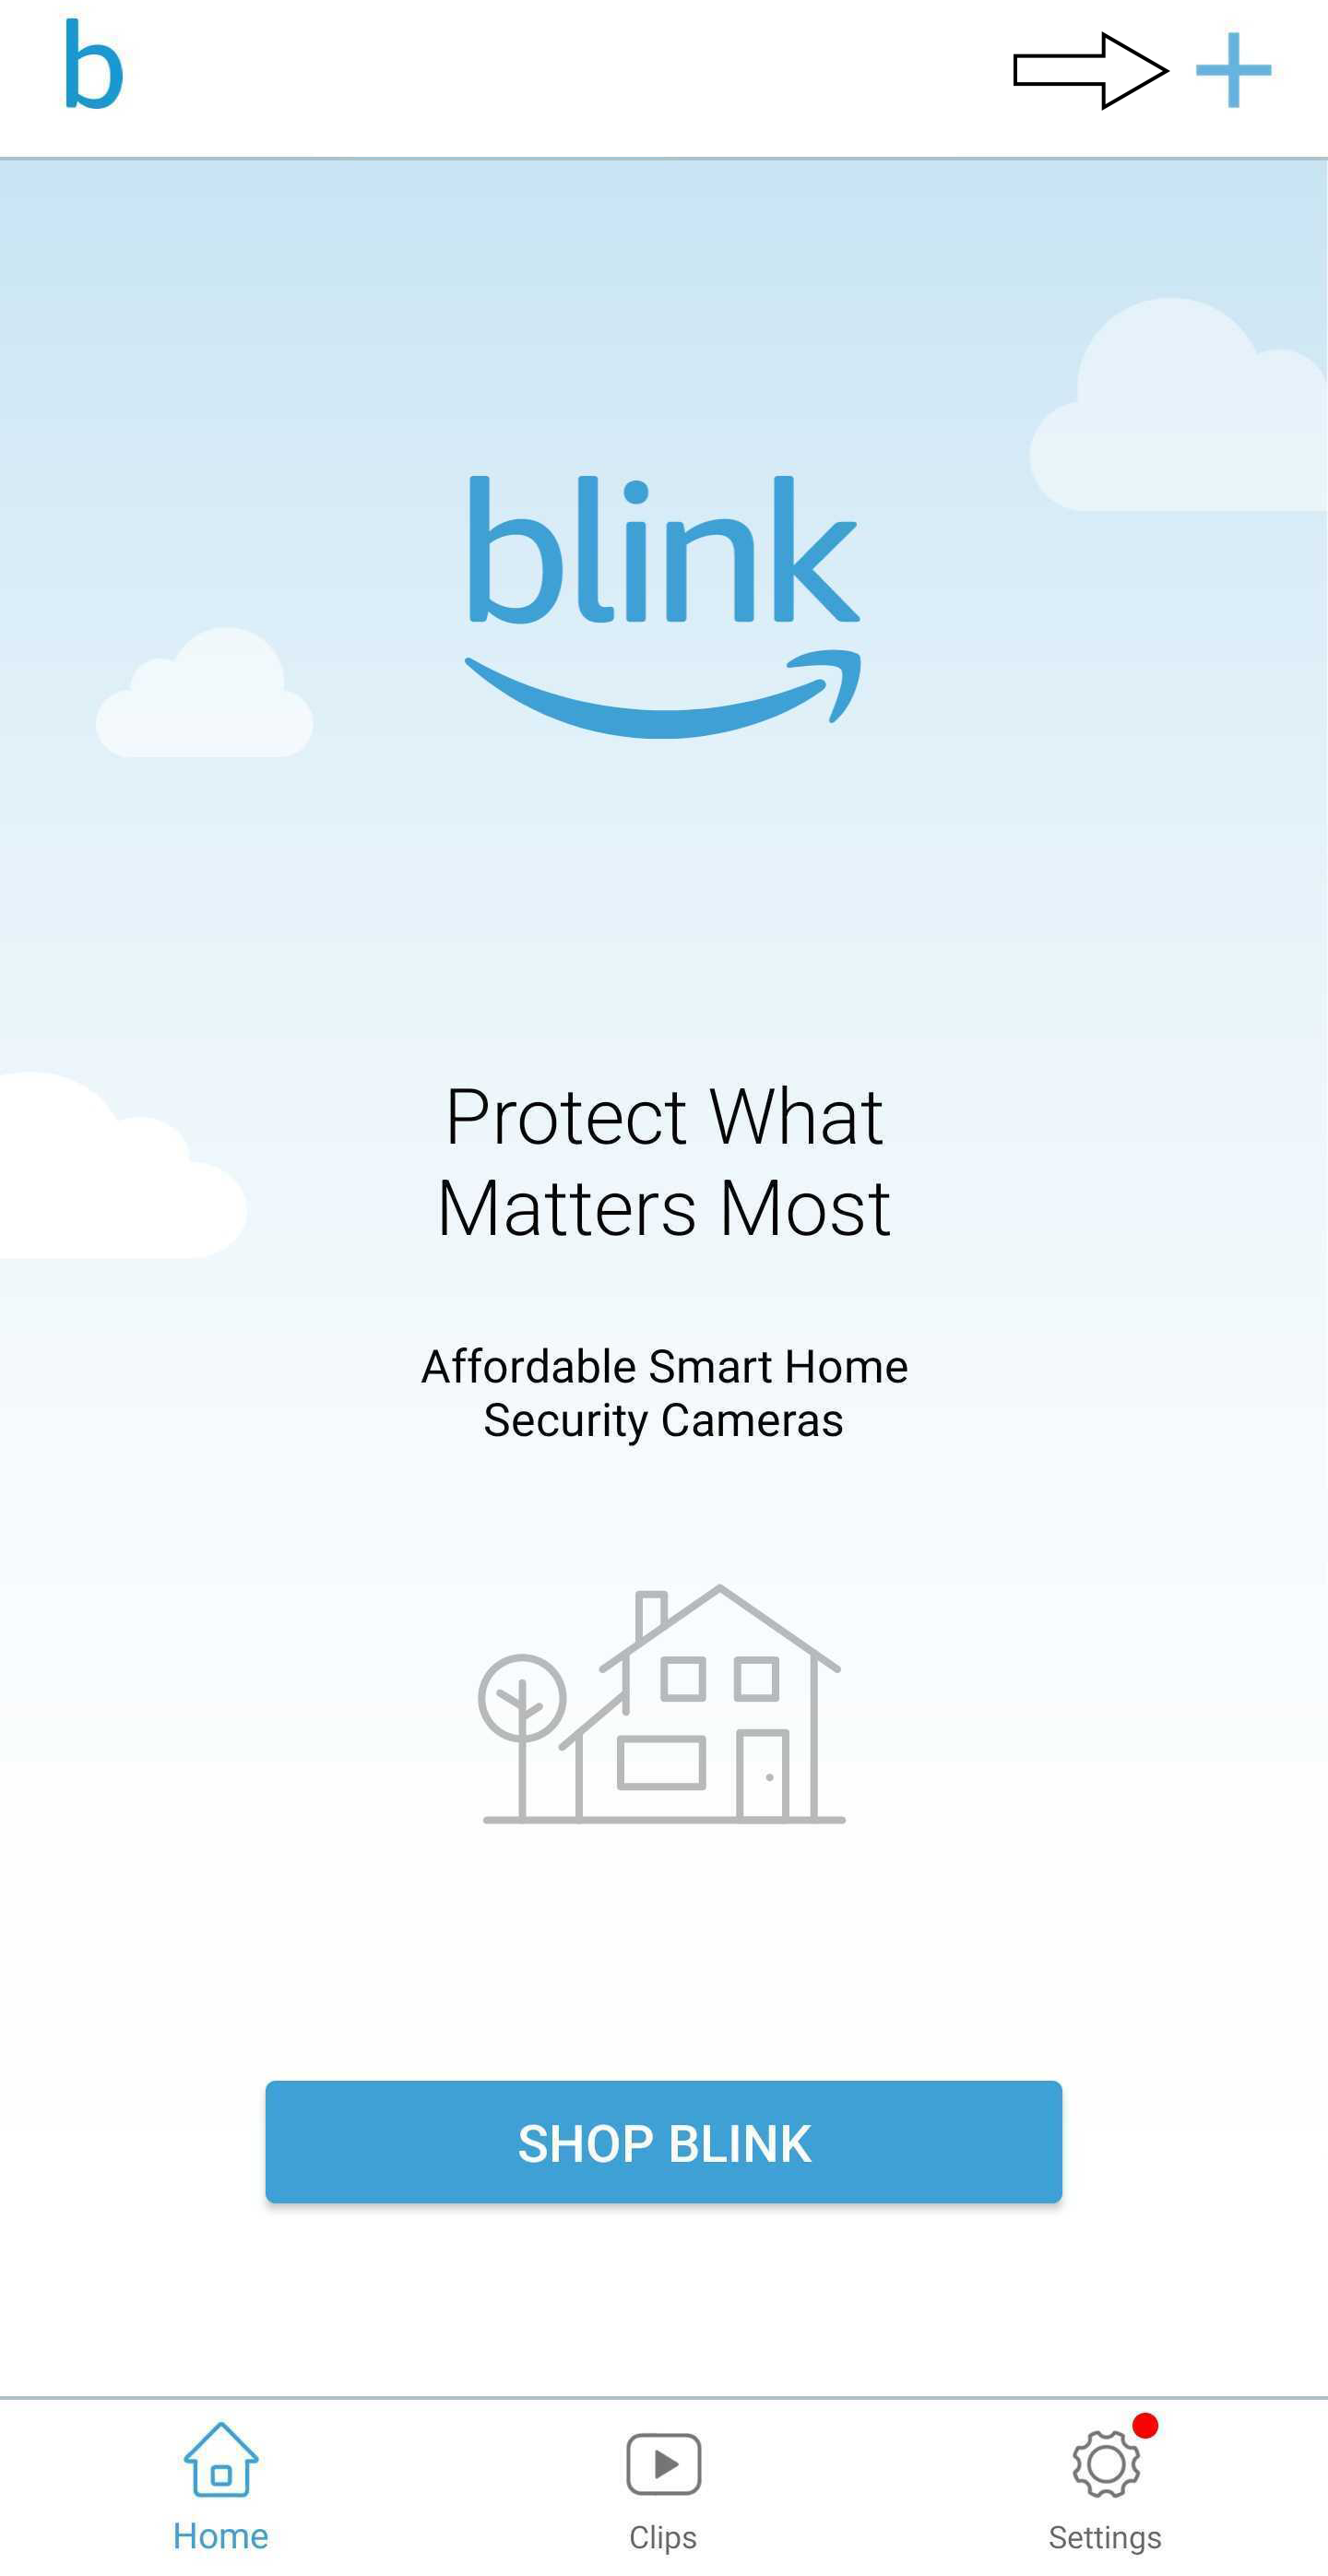
"Outcome Response" appears on the Blink app domicile screen as an overlay, shown in the image below. In Event Response, the doorbell is not connected to the internet total time, and so you must printing the ringer button to complete whatsoever Settings or Arm/Disarm activity.
If you install a Sync Module afterward the doorbell
When you add a Sync Module afterward the doorbell has been installed, select the doorbell system when yous reach that step. If you consummate the Sync Module setup on its own organisation, the doorbell informs you lot that it is available for connexion.
Link: Adding the Blink Video Doorbell to your system
Consequence Response Details
Saving Clips
Event Response mode, by itself, provides motion alerts and doorbell press alerts only. To save video clips when move is detected or the ringer push button is pressed, add together the doorbell to a Glimmer Subscription Program, or connect to a Sync Module ii with a recognized USB drive inserted for Local Storage.
Viewing Clips
On the clip list screen, Doorbell clips are shown with a "Bell" icon ![]() , and if you do non have a subscription or Local Storage you come across the "Non Media Event" screen indicating that an issue happened, but no clip was saved.
, and if you do non have a subscription or Local Storage you come across the "Non Media Event" screen indicating that an issue happened, but no clip was saved.
Alerts and Notifications
When the doorbell push is pressed, or when the doorbell is "Armed" and motion is detected, you receive alerts in the Blink app. You can tap the alert within sixty seconds to enter a Alive View session with two-fashion talk. To save batteries, the doorbell enters a sleep fashion after 60 seconds.
Press Doorbell to Save Changes
In Effect Response, you must press the doorbell push to 'check-in' and download any new settings changes. Without a button press, or movement activation effect, your doorbell checks-in one time every 24 hours to automatically download any new configuration changes.
Photograph Capture
Photograph Capture is available if y'all accept an active Blink Subscription Plan or free trial. Photo Capture stores a photo every hour, and if there are no other events, it puts them together into a compressed-time video y'all can run into in the Blink app'due south clip list. When a motion event or doorbell press does happen, the Photo Capture stops so your notification tin get through, and then resumes afterward. Each time Photograph Capture stops, you receive a video of the images taken up to that point.
Video Thumbnail
When the doorbell is in Consequence Response mode, and a subscription is active, the on-screen thumbnail is updated each fourth dimension the doorbell ringer button is pressed.
Unavailable Features
These features are non available in Result Response at all:
- ZonesBeta
- Live View started from the Blink app
- Thumbnail image started from the Blink app
- Scheduling
- Live View on Alexa enabled devices
When at that place is no agile subscription, and no Local Storage configured, these features are not available in Outcome Response:
- Save Motion Clips
- Save Live View
- Receive Photocapture clips
Bombardment Life
Battery performance is direct related to the amount of use. To meliorate battery life and gain features, visit Using the Blink Video Doorbell with a Sync Module, or consider connecting your doorbell to an existing chime with Blink Video Doorbell wired installation.
In Outcome Response, without a storage configured, or a subscription, yous will not be able to save move clips, live views, or photocaptures.
Event Response Installation
Setting upward your doorbell to apply Event Response happens automatically when you do not connect to a Sync Module or powered wiring.
Calculation the Blink Video Doorbell to your system
Add your new Doorbell
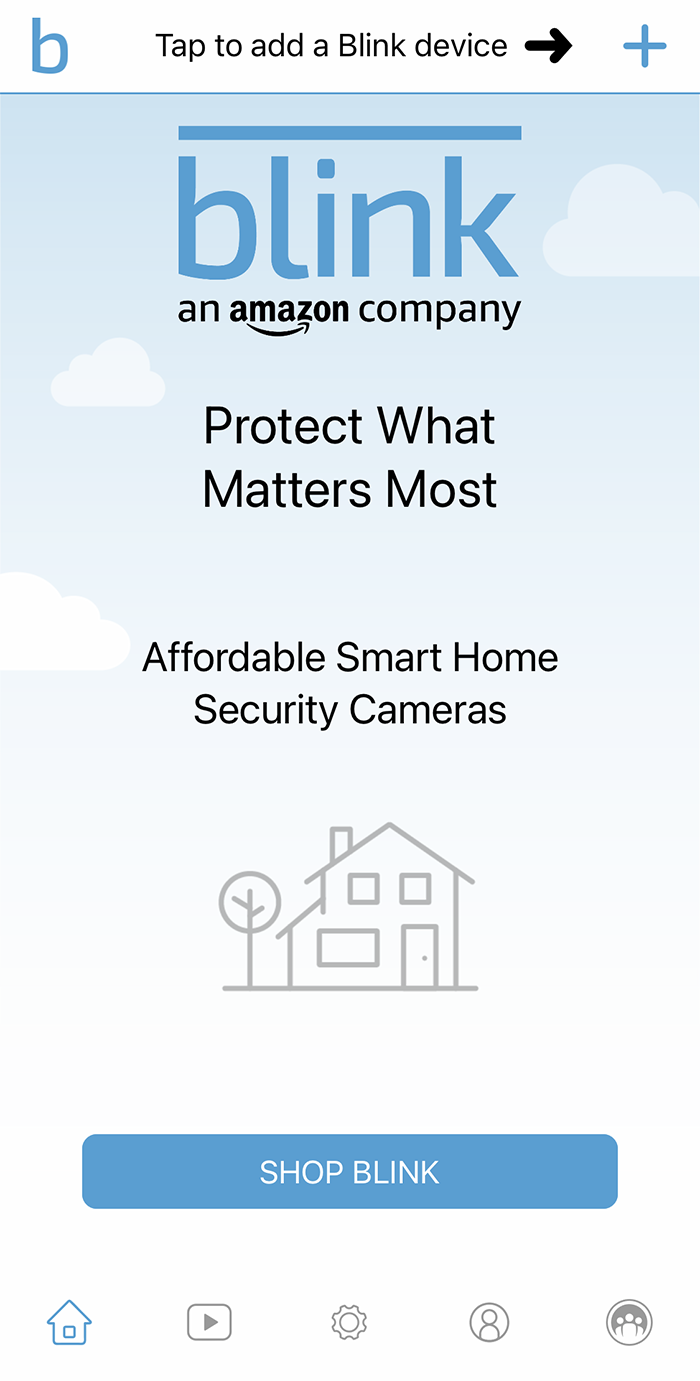
From the Abode screen of the Blink app, tap the bluish "Plus" sign +in the upper right corner of the screen to add a new device.
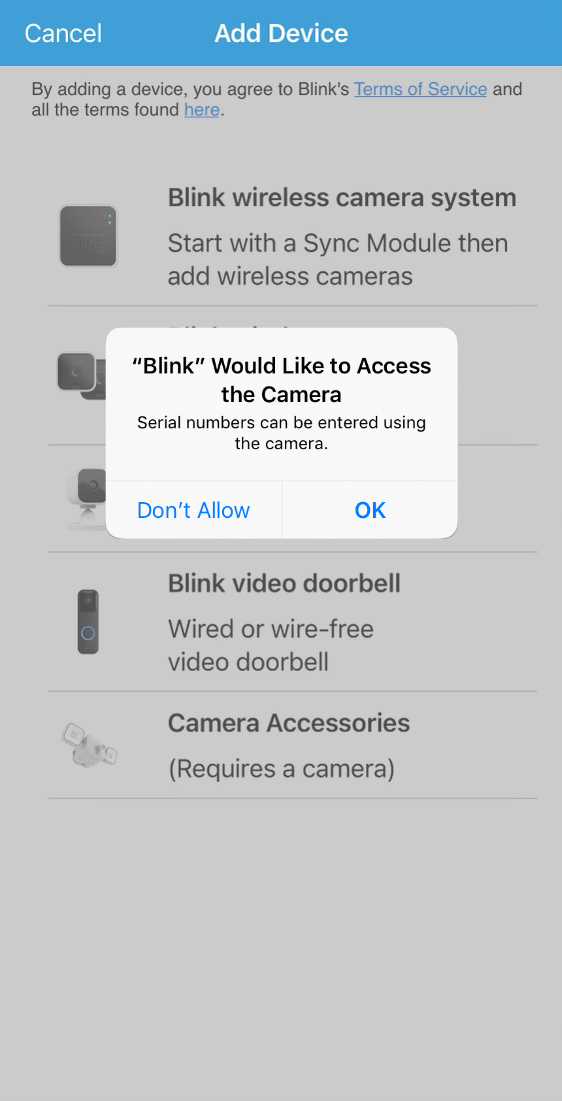
In the adjacent screen, tap the device you wish to add. Then the blink app requests to utilise your device camera to scan a QR lawmaking to automate some of the setup process. The QR code represents the device serial number (DSN).
Tap "OK" to safely let camera access.

If the doorbell is not already open, remove the back plate with the opening primal that is taped to the paper template inside the doorbell packaging. Insert and elevator the key to open, and turn over the doorbell to discover the battery compartment and DSN label.

Brand sure the QR lawmaking on the doorbell is in your camera view and in focus. Tap the flashlight icon to turn on your camera flash if needed.
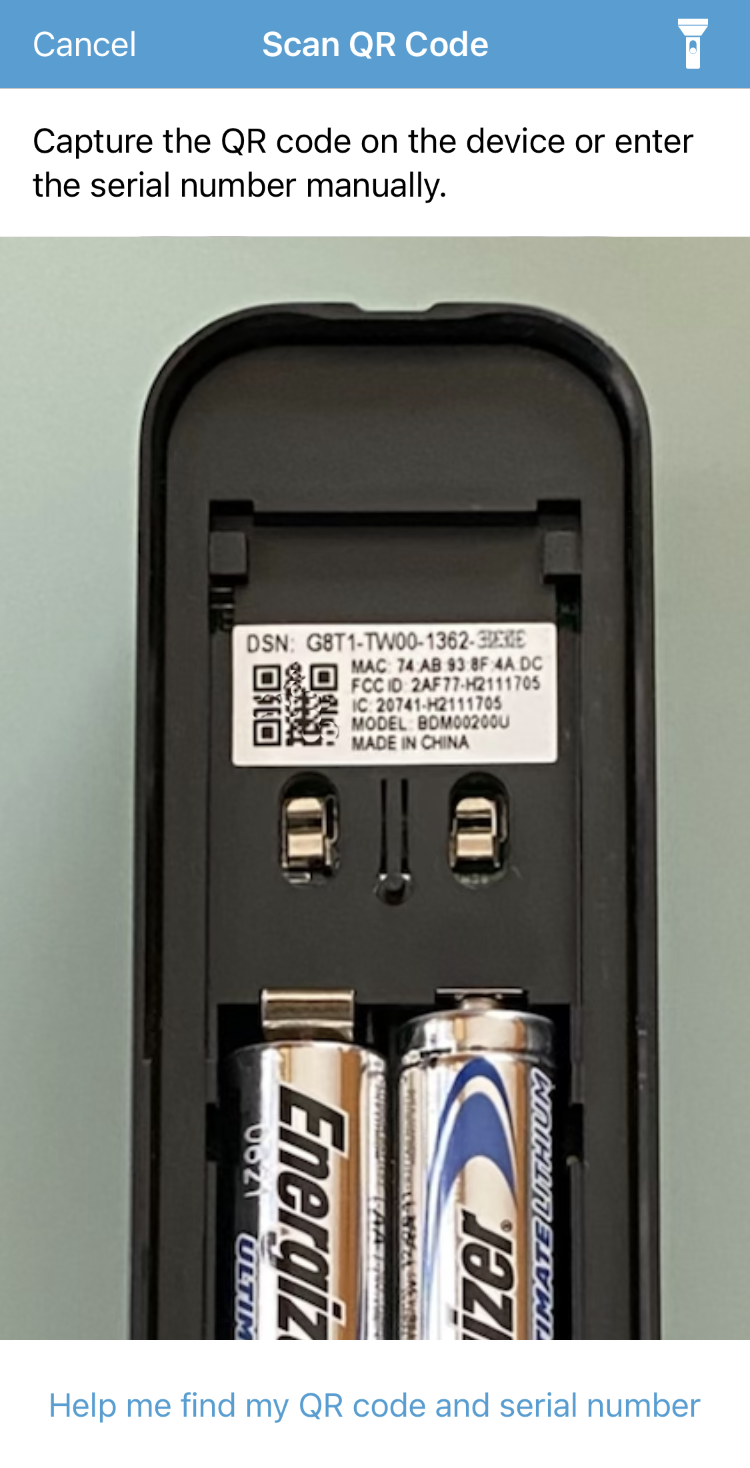
A green square appears when your phone photographic camera 'understands' the QR code.
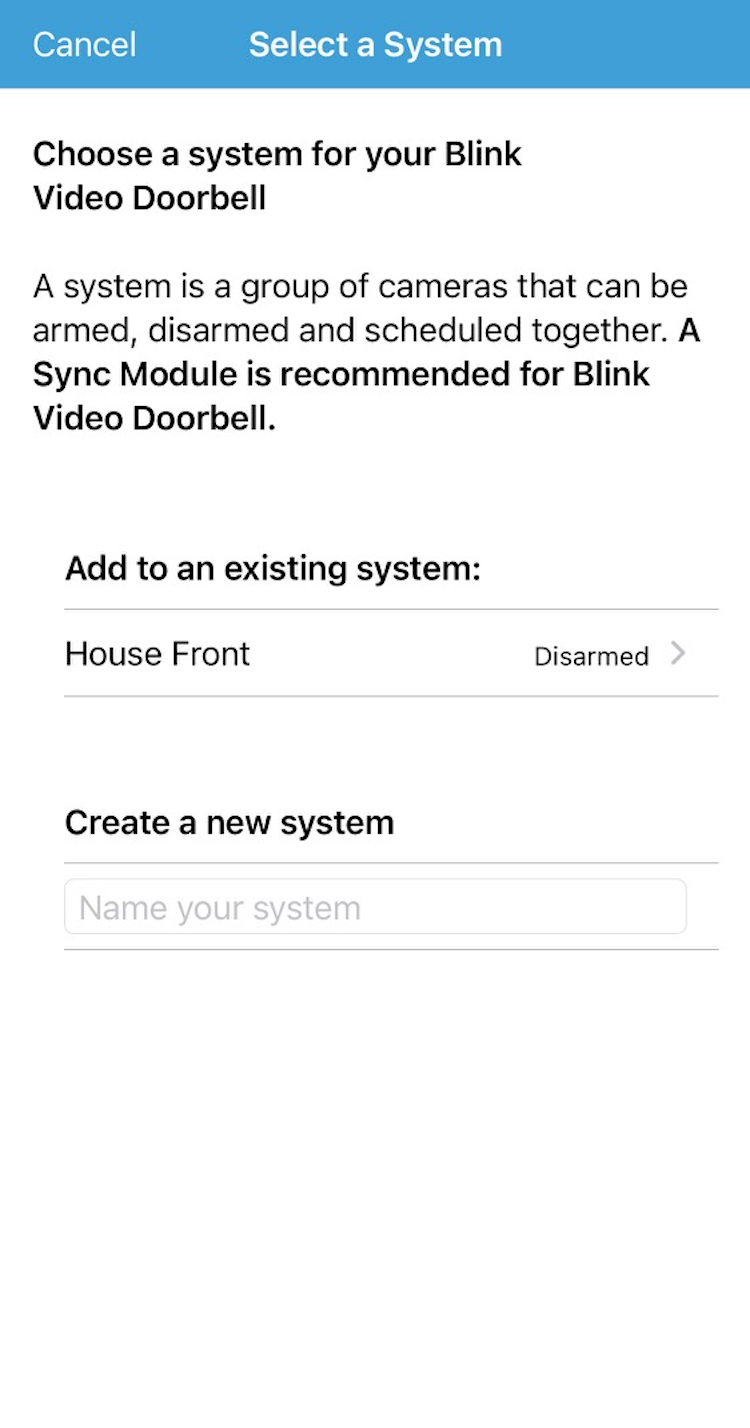
Choose a system or create one
Next, you are asked to cull a system you already take, or create a new system for the doorbell to manage by itself.
If you have already fix up a Sync Module, cull that system, otherwise create a new system proper name.
Sync Module Install
If a Sync Module is not detected, you are asked if you lot would like to install one now.
If you choose to "Add a Sync Module", the QR code scanner opens for you to gear up a Sync Module. When that setup is consummate, yous end upwardly at the dwelling house screen.
It is easiest to choose "Add without a Sync Module" and continue installing the doorbell.

To add a Sync Module subsequently, just tap the Plus + and cull the doorbell organisation during set up up, they will be connected automatically.
Power-up and Connect
Adjacent, you are shown how to remove the back plate of the doorbell. The metal opening central is attached to the newspaper template in the doorbell packaging. Go along the cardinal in a rubber identify for future use. When the back plate is removed, tap "Keep".
 Opening Key
| Your battery compartment has one of two designs. | |
| Just the dorsum plate Insert the primal, lift, or pull towards you, and pull the doorbell off. | With battery cover Remove back plate, then printing the release button on the battery cover, lift, and remove. |
 |  |
| Then y'all are shown where to identify 2 size AA lithium non-rechargeable batteries co-ordinate to the type of doorbell that you have. | |
| | With battery cover |
 |  |
When the batteries are inserted correctly, a ruby LED flashes slowly to indicate the doorbell is ready to exist installed. Tap "Find Device" to consummate doorbell installation.
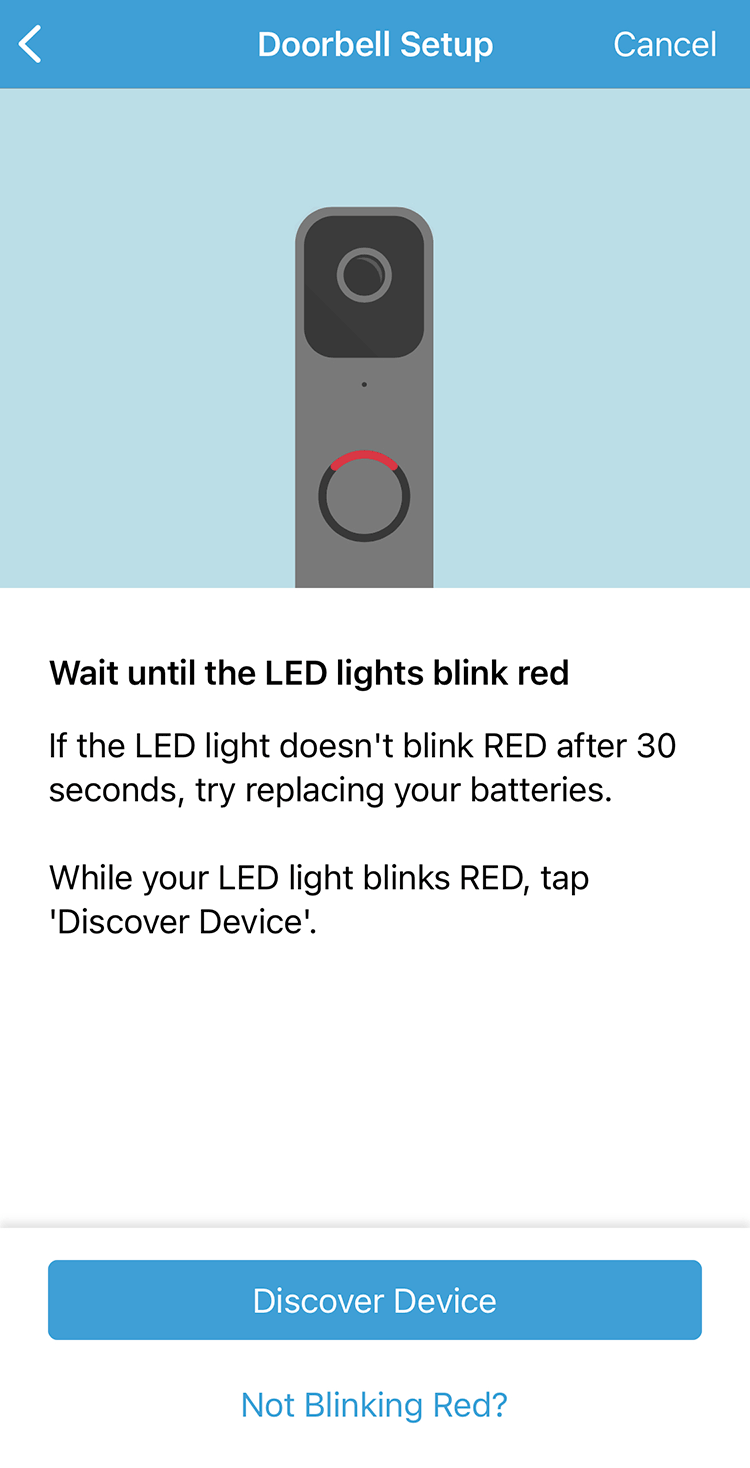 Use the help link if y'all do not see a flashing red LED at the tiptop of the ring.
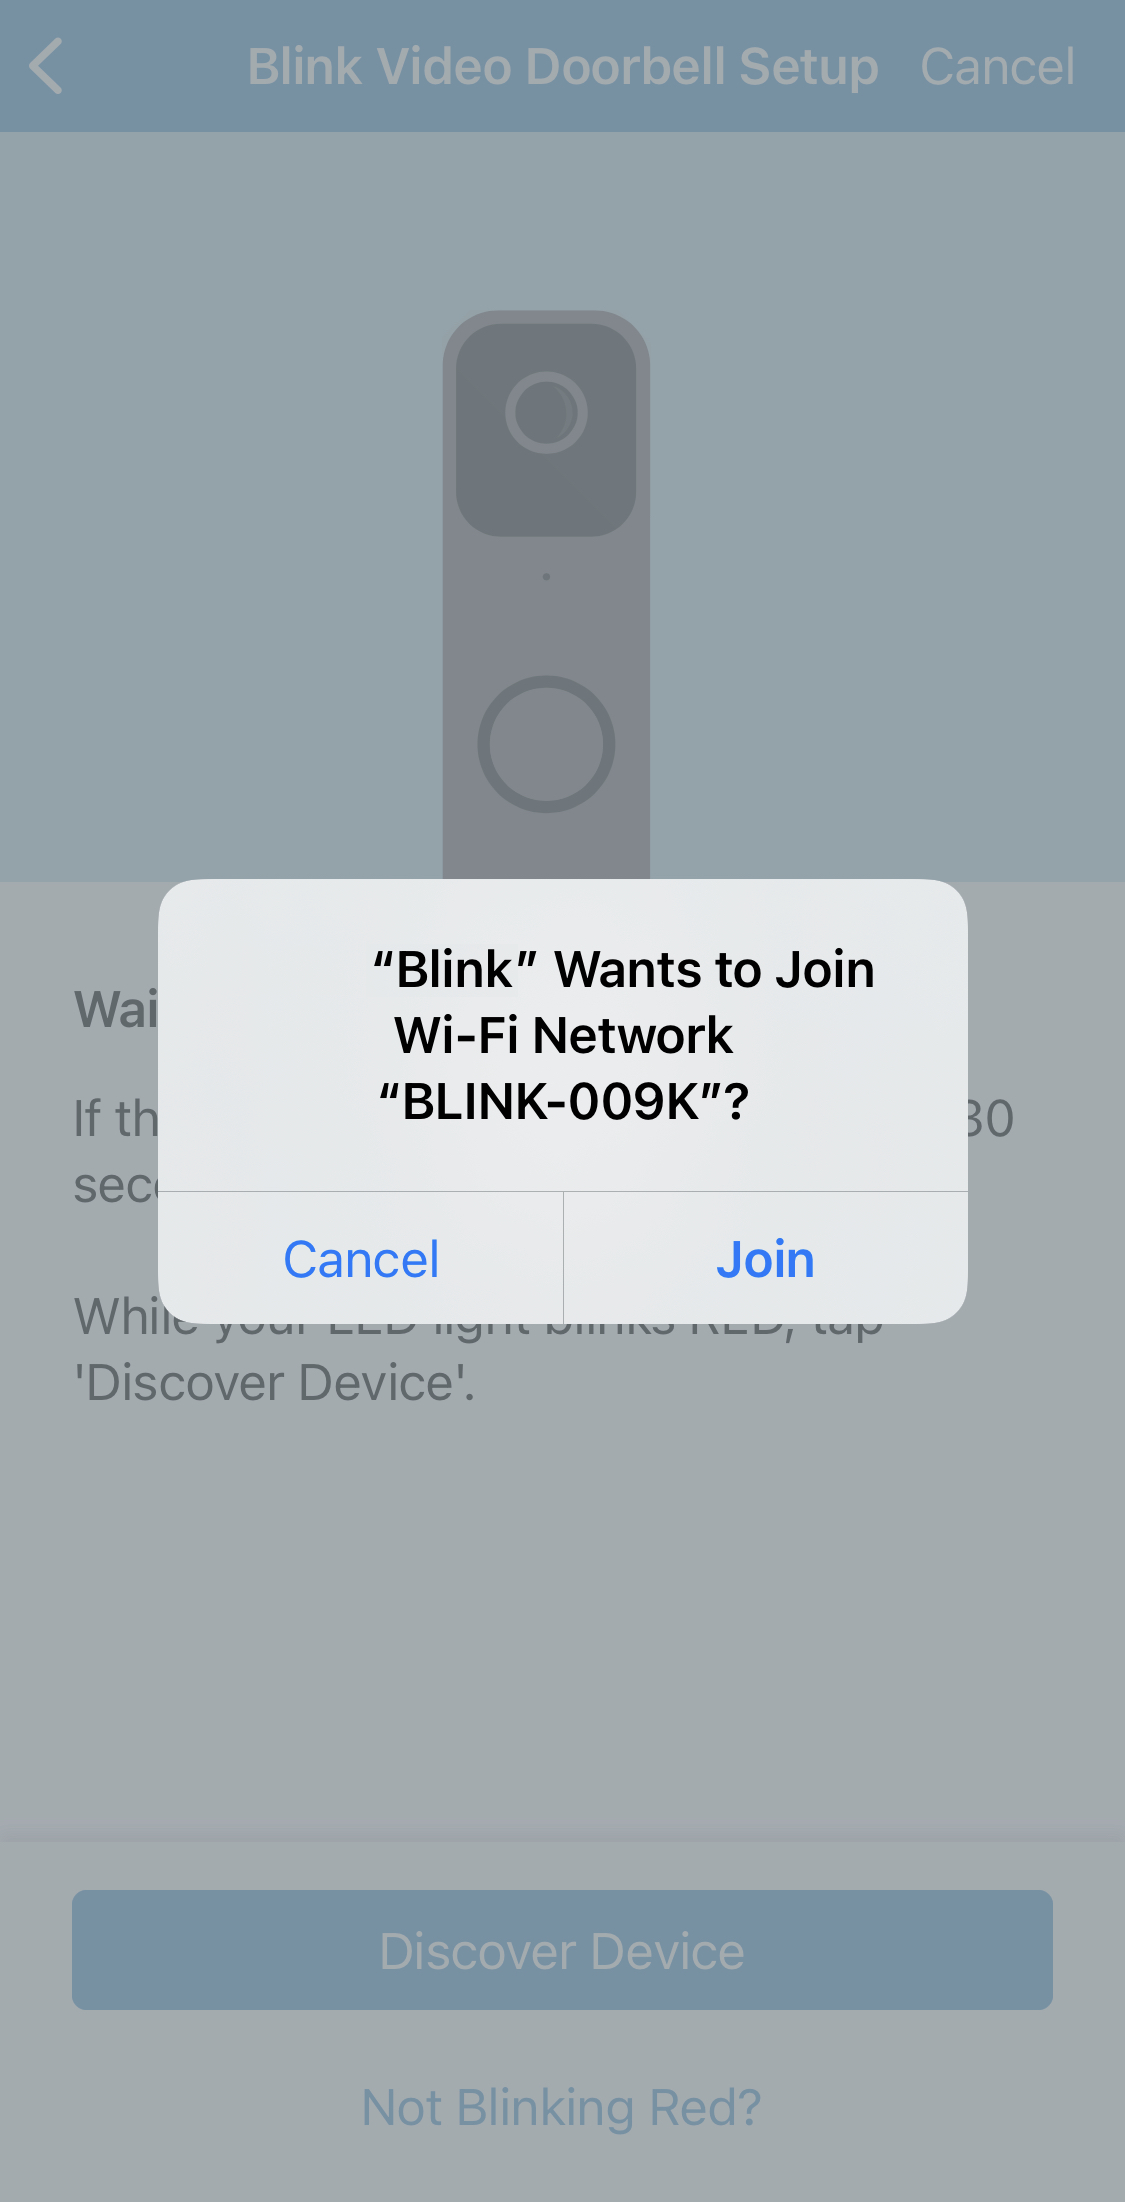
Connect the app to your doorbell'southward "Glimmer" network
When your doorbell is discovered, a popup asks if you desire to connect the Blink app to the doorbell directly. This connectedness configures your organisation. Yous tin safely tap "Join".
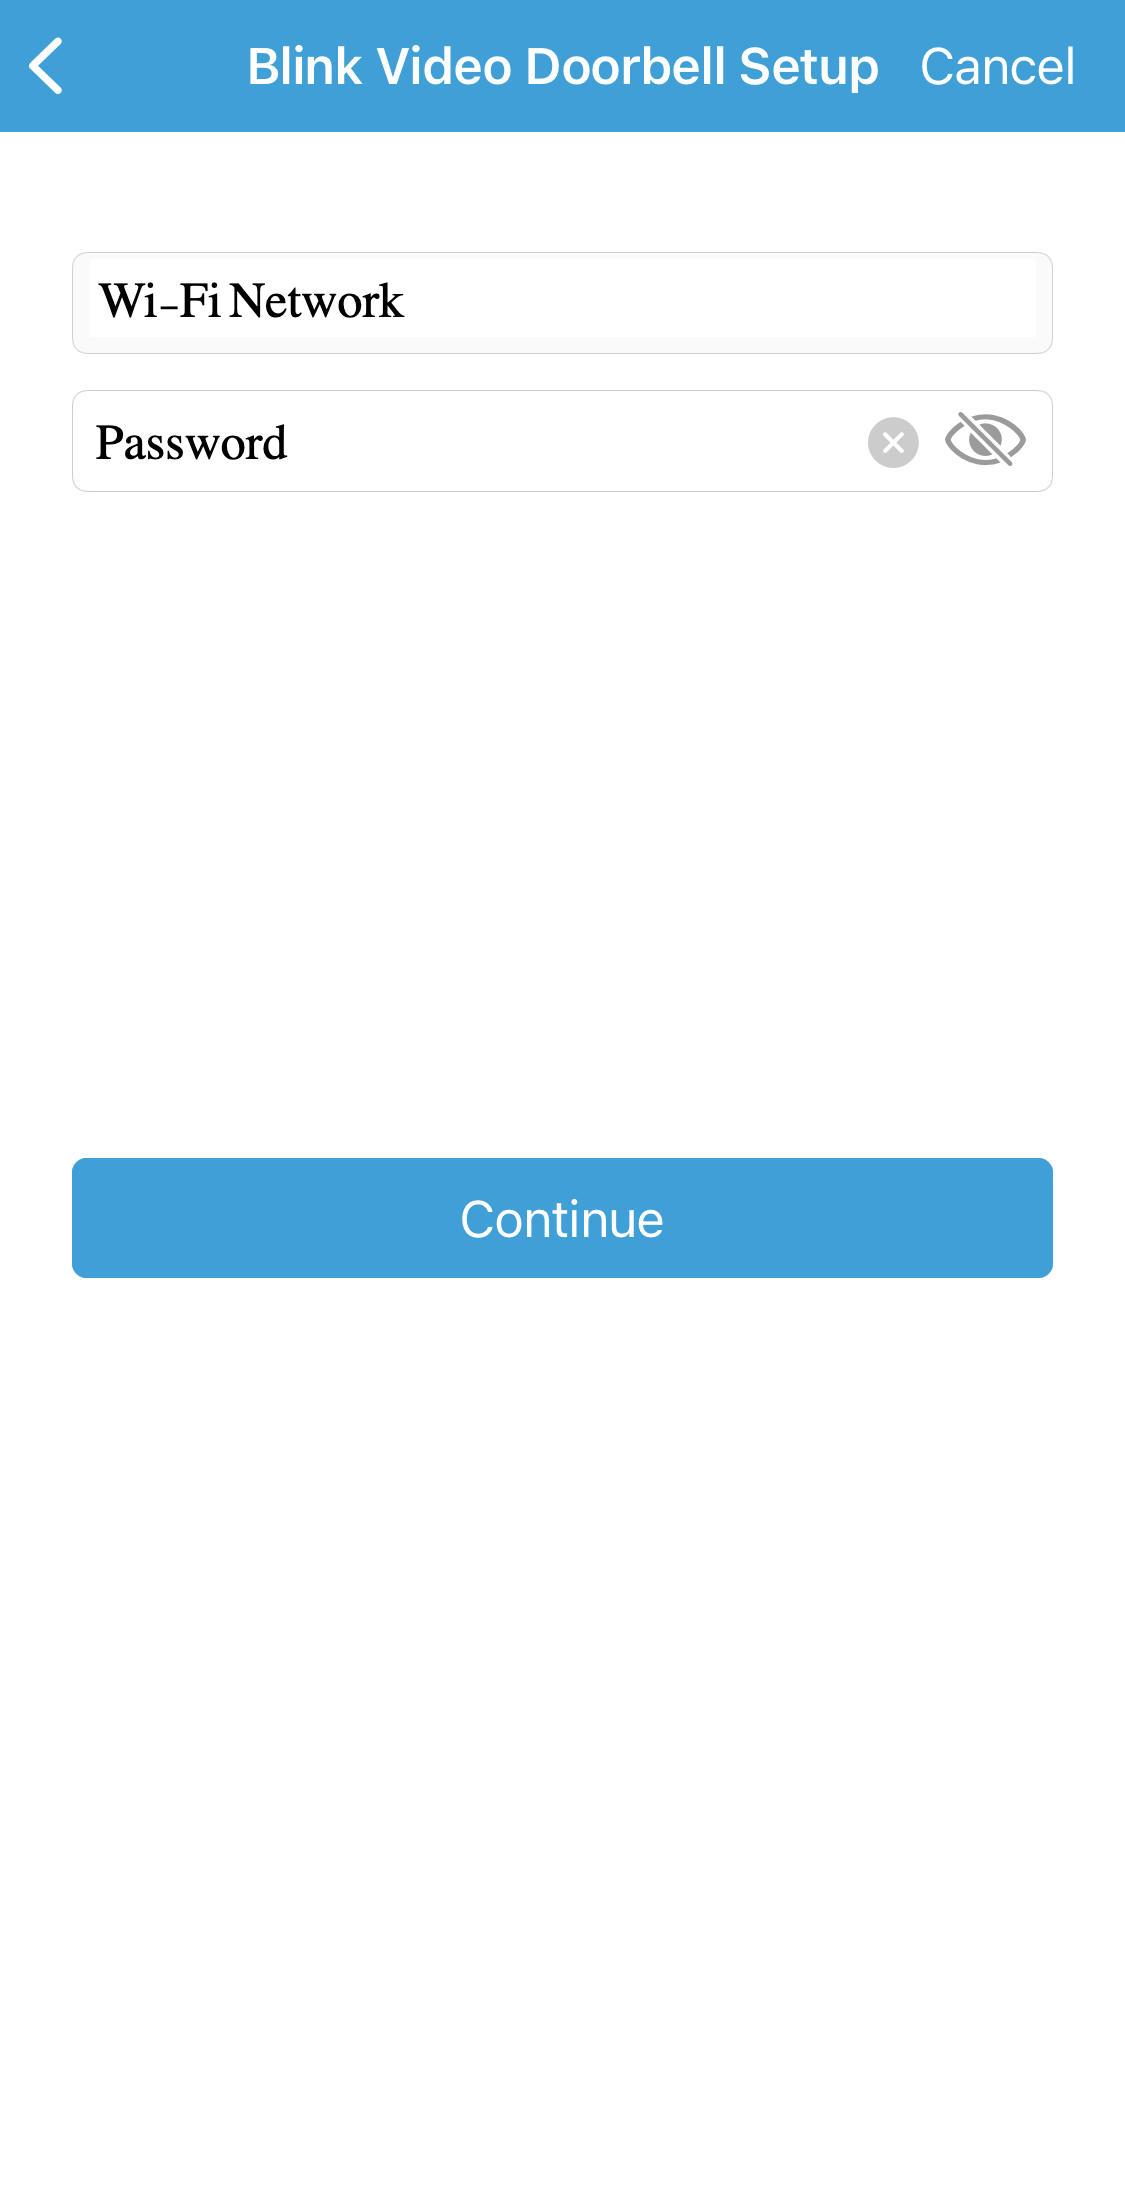
Connect the doorbell to your Wi-Fi network
The available two.4 GHz Wi-Fi networks in range of the doorbell are displayed. Select yours.
If y'all do not see your Wi-Fi network in the list, tap the "Refresh List" button to scan the area over again. Be certain your Wi-Fi router is transmitting at 2.4 GHz.

Enter your Wi-Fi countersign and press "Continue". To be sure y'all enter the password correctly, tap the "center" icon to view the characters.
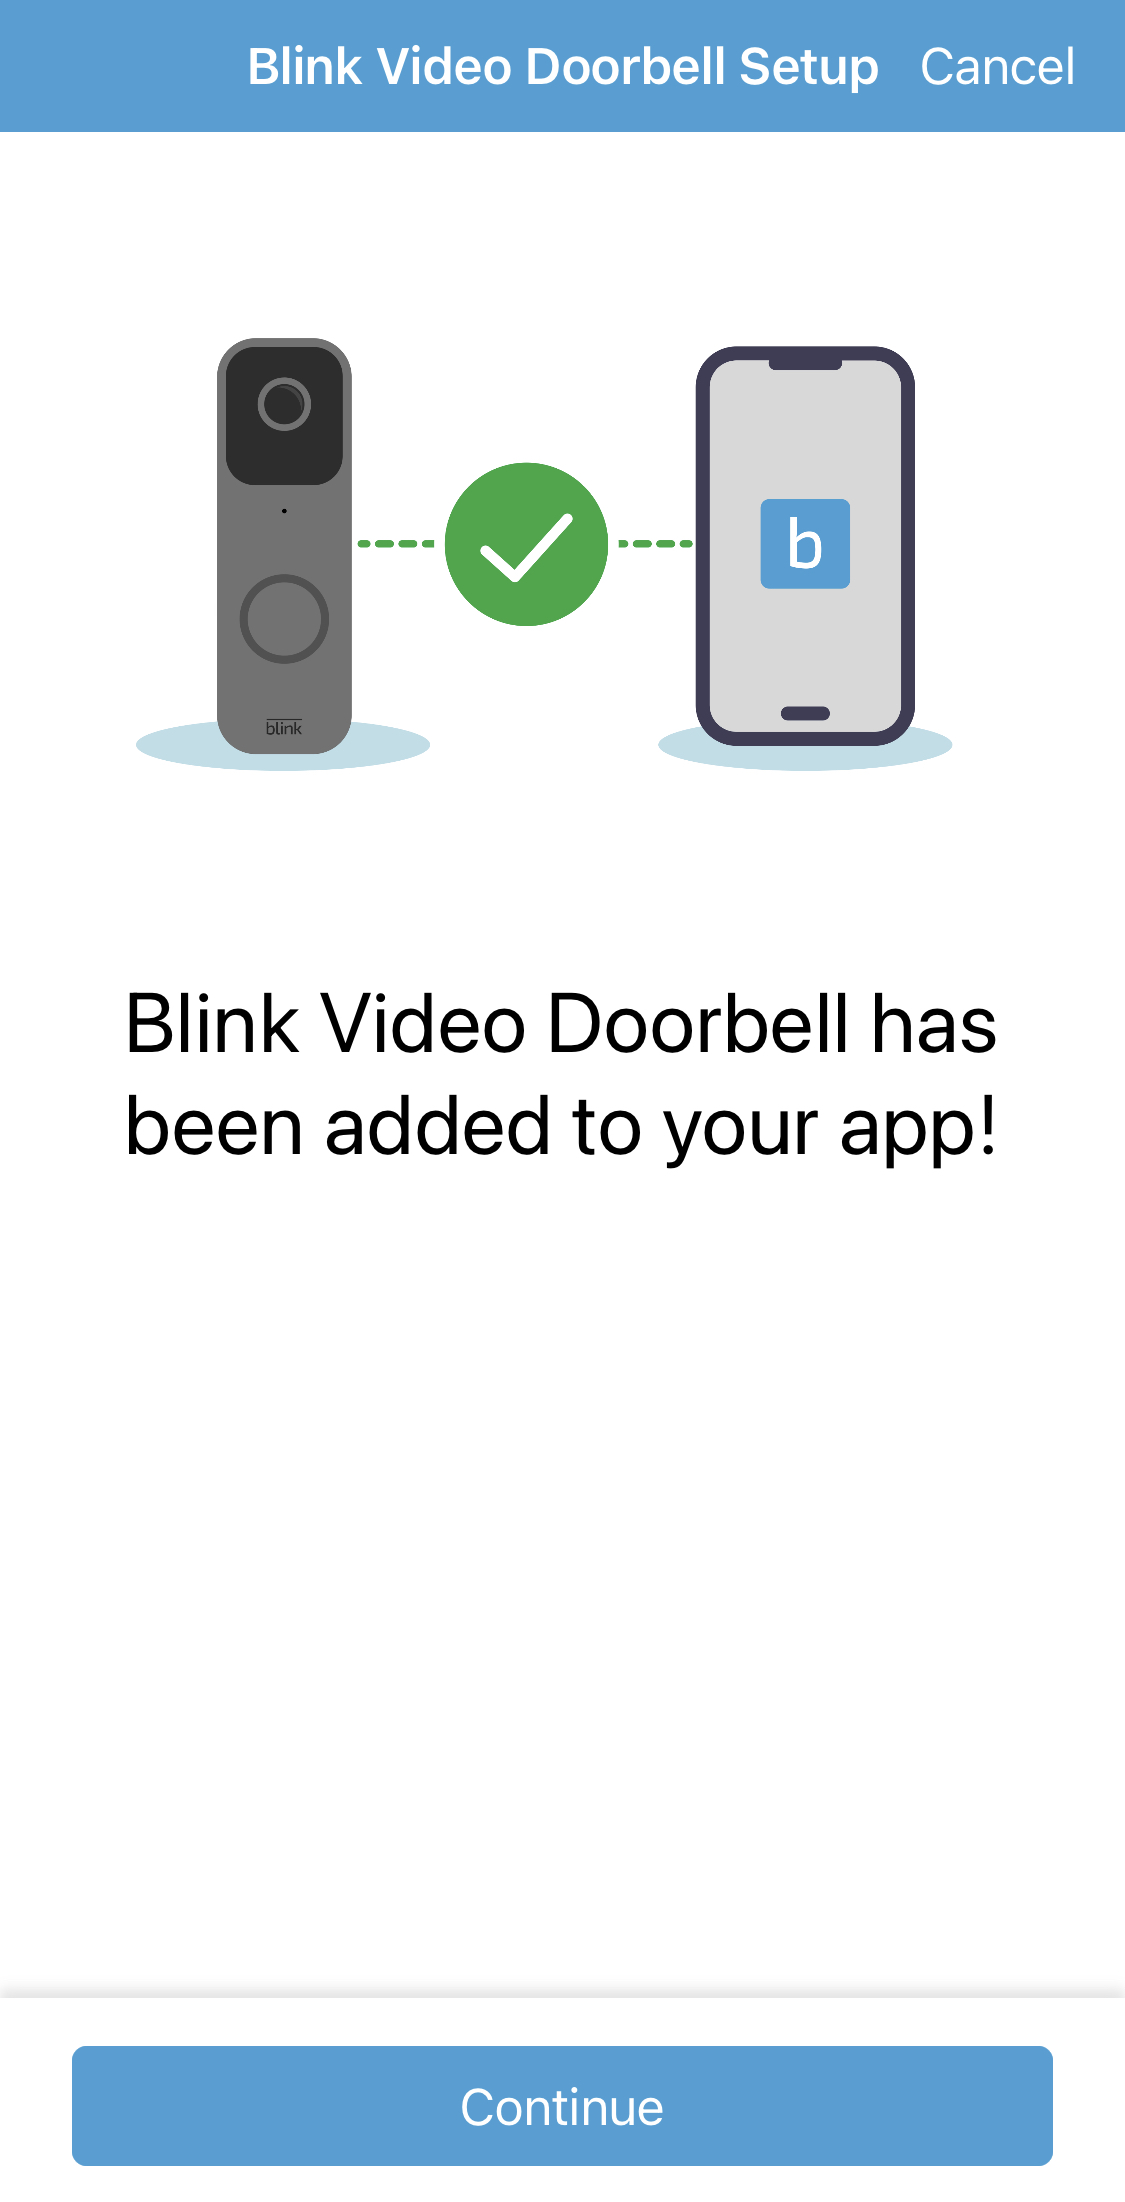
When complete, you are shown a success screen. Tap "Continue" to go to the Home screen.
Delete
Afterwards adding the doorbell to your business relationship, you can choose to mount it.
Mounting the Glimmer Video Doorbell
Mounting is slightly dissimilar for each way of dorsum plate, but they each use only two screws.
Video tutorial: Glimmer Video Doorbell ii hole mount
Two hole back plate
Prepare a location to mount the Glimmer Video Doorbell
Once you decide on proper placement, clean the surface well. The back plate needs to grade a atmospheric condition tight seal, then mounting on a flat sturdy surface is important.
To adapt the view 5º upward-downward, or 25º side-side, click to learn about installing a wedge or corner mount.
A paper template is included with your doorbell to show how far autonomously you drill the mounting holes. The template is shipped with the doorbell opening key attached. Save the primal for future use. The same template works for Wedge and Corner Mounts.

How do I mount on vinyl siding?
To avert damaging your vinyl siding, you may choose a mounting arrangement other than the included mounting screws.
There are kits available to mount a wireless doorbell on standard vinyl siding. Some adept search terms are "surface block" and "vinyl siding wall plate".
If you are not using the mounting holes that are molded into the back plate, cover them with duct tape to go along out dust and water.
Delete
How do I attach the back plate before mounting?
If you adopt to mount in a mode other than the mounting screws, the following video shows y'all a way to connect the dorsum plate to the doorbell before information technology is mounted.
If you mount without screws (double-sided tape, or another method) exist sure to cover the screw-holes in the back plate, to prevent moisture entering the doorbell. By design, mounting screws fill the space and continue your doorbell weather resistant.
Delete
Should I install a Wedge or Corner Mount?
The wedge and corner mounts (included in some packages, or sold separately) can correct the doorbell view when the only available surface is angled, or y'all want to suit the view.
- Wedge changes the view 5º upward-downwardly
- Corner Mount changes the view 25º side-side.
The camera in the doorbell has a field of view pointing straight out from the mounting surface. If the epitome does not capture the view yous want, calculation a wedge or corner mount tin can assistance. A Wedge offers 5° vertical tilt (up and downwardly), and a Corner Mountain offers 25° horizontal tilt (side to side).
Click to visit the Amazon purchase page for the Wedge and Corner Mount accessories (external link, opens in a new browser window).
How to Install the Wedge or Corner Mount
Bank check the doorbell view and placement by pressing the doorbell push, and so in the Blink app, tap the notification you receive to enter Alive View.
While in Alive View, you lot are looking out of the doorbell camera. You can adapt the position and location to get the view you want, before drilling into your wall.
The included drill template works for the mounts and the doorbell.
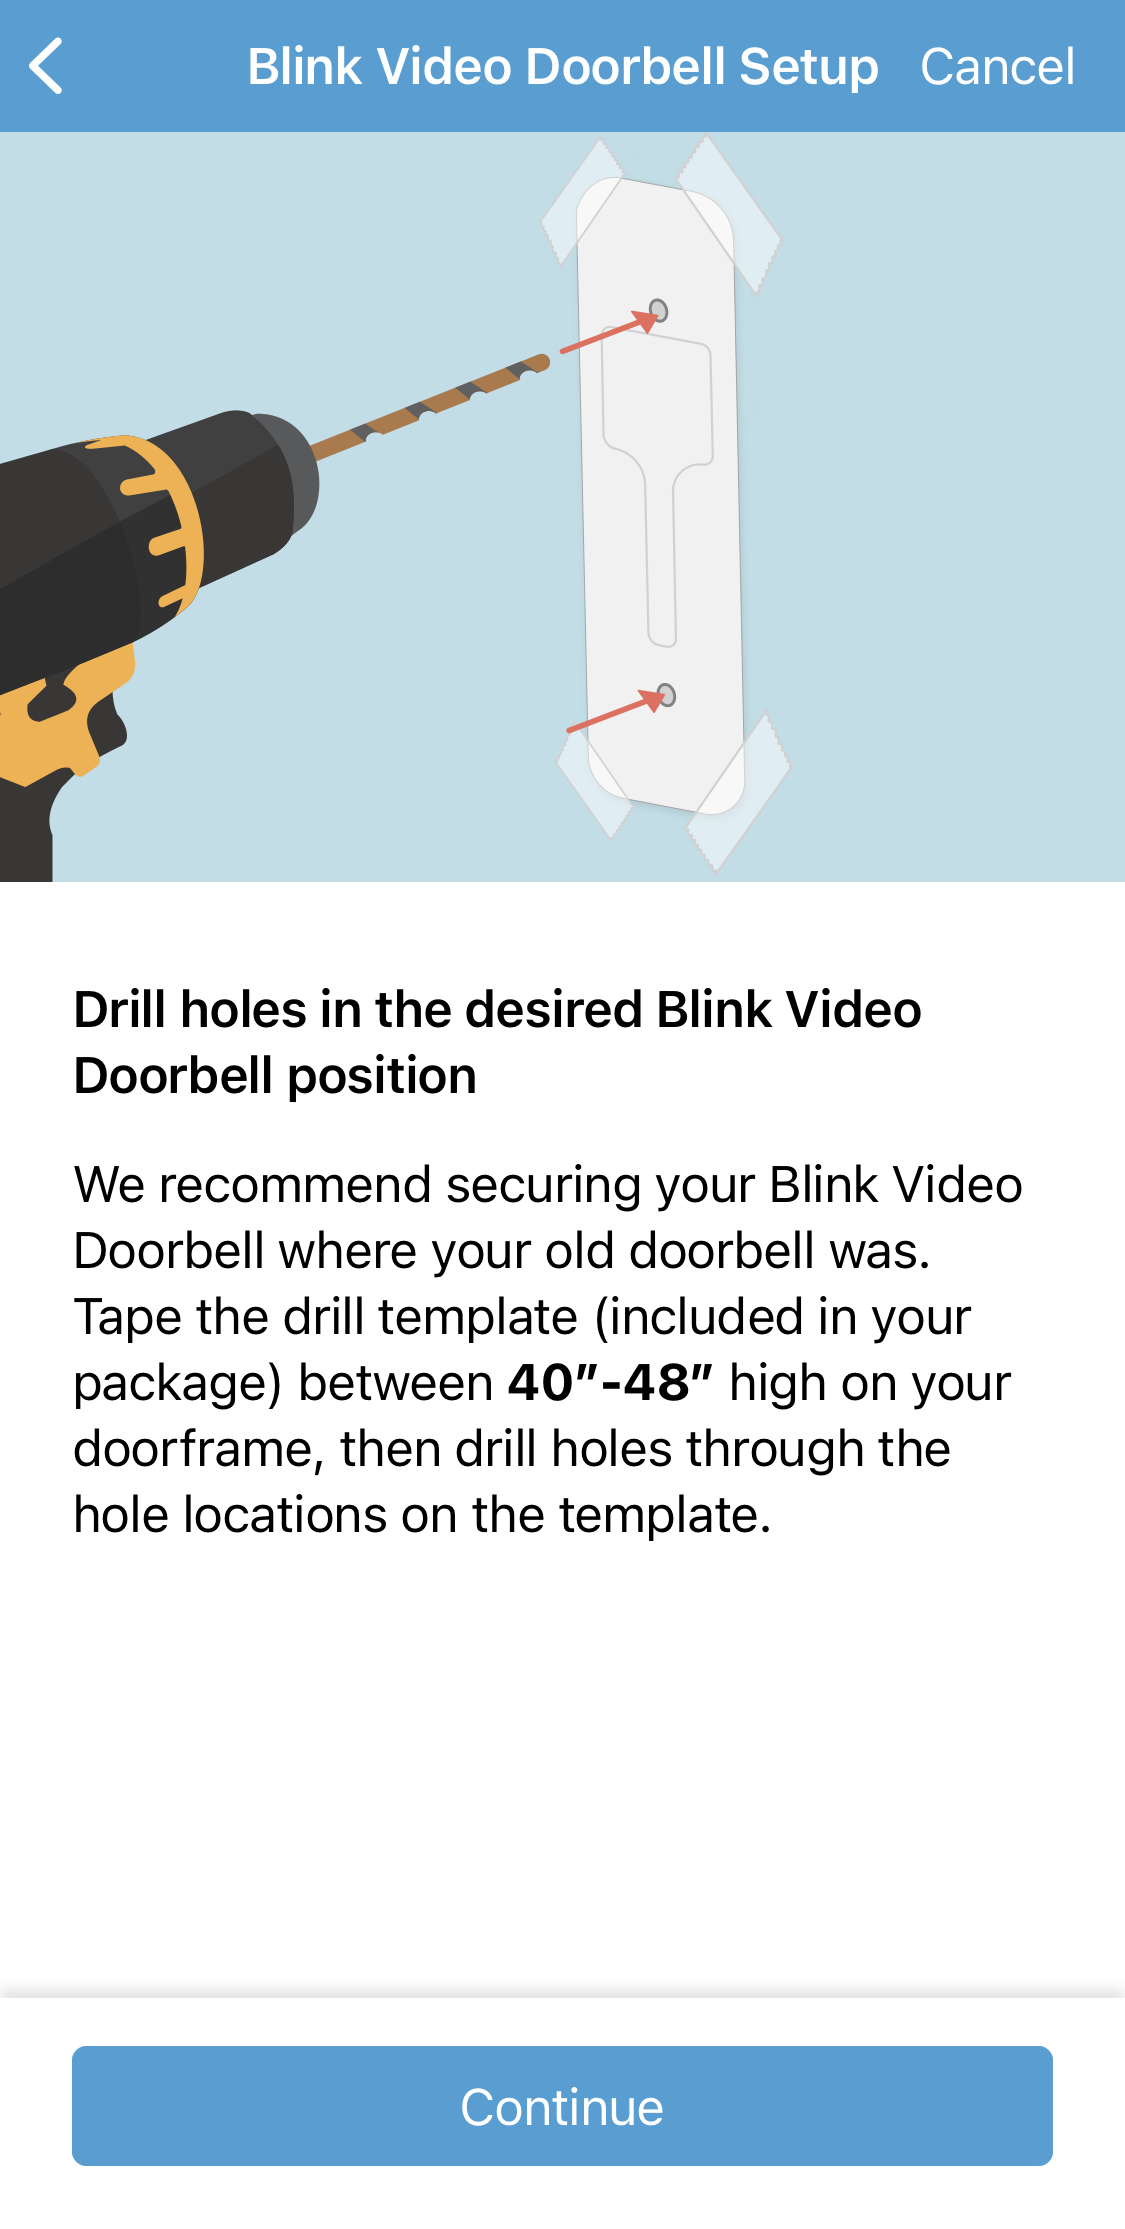
1. Drill mounting holes.
Tape the template in place approximately 40 - 48 inches (102 -122cm) in a higher place the basis. If you want to use the wiring from a doorbell y'all already have, place the template so that the wires will reach through the central open expanse of the wedge.
2. Mountain accessory so attach dorsum plate.
The Wedge and Corner Mount ship with a pair of shortened all-purpose screws. They are meant to be used to secure the back plate to the accessory ("2" in the image). Use the pointed, regular-length screws to secure the accessory to your wall or surface ("i" in the image). See diagram for more details.
| 1. Regular length multi-purpose screws attach the Wedge or Corner Mount to your location through slots in the accessory. | 2. Shortened screws secure the dorsum plate to attachment points molded into the Wedge and Corner Mount. | Doorbell shown fastened to Wedge and dorsum plate. |
 | ||
Click for detailed instructions
1. Apply the longer pair of screws to secure the wedge or corner mount, offset. Make sure to put the screws through the slot openings every bit shown.

Wired installation details | |
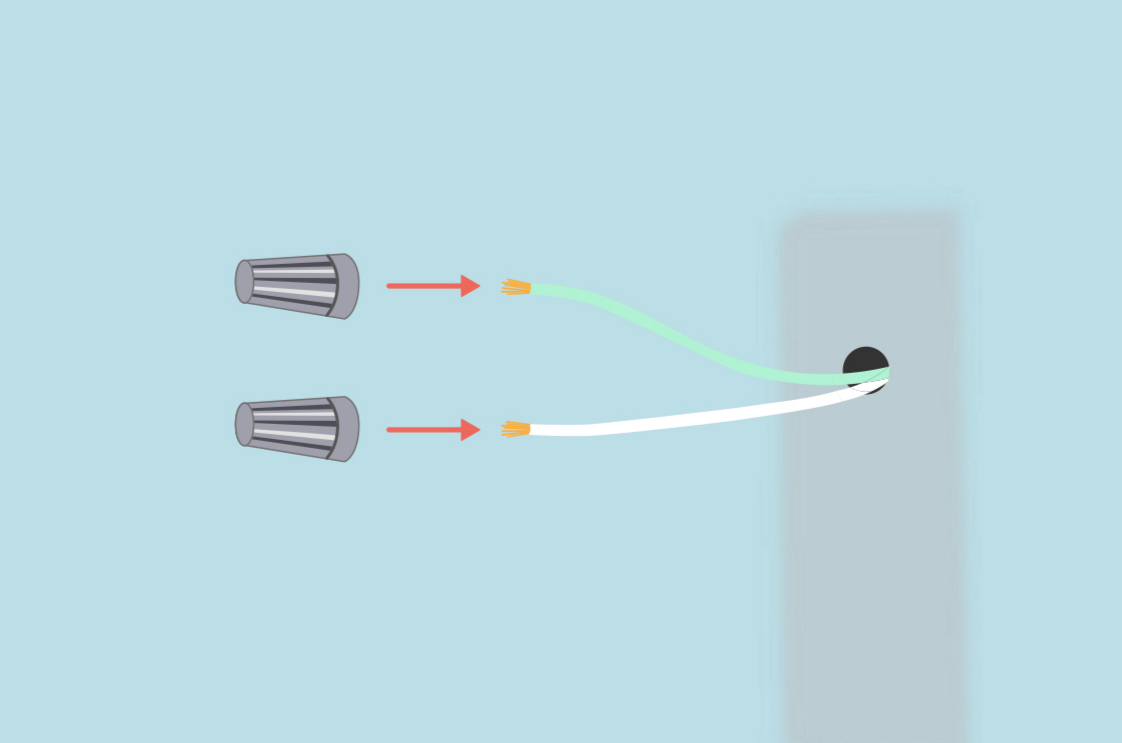
| Back plate with screws | Dorsum plate with opening |
| Attach 1 doorbell wire to each machine screw on the back plate. Wire color is not a factor for this installation. If needed, two extra screws are in the box. | Adhere the back plate to the wedge or corner mount, with the shorter pair of screws, included in the accompaniment packaging. |
 |  |
| Attach the back plate to the wedge or corner mountain, with the shorter pair of screws, included in the accessory packaging. | Attach ane doorbell wire to each terminal screw on the doorbell. Wire color is not important hither. If needed, 2 extra screws are in the box. |
 |  |
| Finally, use a two step motility to attach the doorbell to the back plate.
 | Now, attach the doorbell to the back plate by lining upward the top and pivoting downward. Press until yous feel or hear a click and the doorbell is secure. |
Delete
three. Attach the doorbell and test.
One time the doorbell is in identify, if it has already been set upwardly, press the doorbell push button and y'all will receive an alarm notification. Tap the notification to see through the doorbell camera and make certain the view is what you want. If you have not set up the doorbell nonetheless, visit Setting up your Blink Video Doorbell.
If you have prepare an Activity Zone or Privacy Zone, be aware of how they have been affected by the change in photographic camera view. You may have to re-set the Activeness or Privacy zones.
Click to learn more almost Blink Video Doorbell Motion Detection.
Delete
How do I use wall anchors ?
The wall anchors are made of white plastic and are to be used when the threads of the screw cannot dig into the cloth, such every bit with brick. You drill a hole large enough for the wall ballast to fit tightly into, then when you use the mounting screw, it's threads can concur securely.
- Drill a 7/32-inch (v.41 mm) hole, 1 inch (2.v cm) deep.
- Insert the wall anchor until it is flush with the mounting surface.
- Continue with the installation.
Delete
Tools
You will need tape to hold the template in place, a screwdriver, a drill, and the articulate plastic pouch with screws and wall anchors. To drill mounting holes, select the bit size you demand:
- Just the screws: 3/32-inch (two.375 mm)
- Wall ballast: 7/32-inch (5.41 mm)
Delete
Tape the paper template forty - 48 inches (101.half-dozen - 121.9 cm) above the flooring.
Drill two guide-holes approximately 1 inch deep (2.5 cm).
For mounting on brick, stucco, or drywall-type materials, yous may want to employ the included white plastic wall anchors. Wall anchors grip the threads and provide outward force per unit area against the walls of a drilled hole. Included wall anchors fit the pigsty from a seven/32-inch (5.41 mm) drill bit.
Remove the paper template.
Secure exposed wires if necessary.
If you are not using existing wires, but they are present, twist a gray terminal cap onto each exposed wire tip to prevent unsafe sparking or other bug. Find two terminal caps in the accessory purse with the mounting screws.
Adhere the dorsum plate to your surface with 2 screws (practice not over tighten)
All-purpose screws are included with two wall anchors and wire terminal cease caps in a clear plastic pouch. Use but 2 screws to mount the back plate.
 |
| Notation: Mount the back plate on a business firm, flat surface, to form a weather seal with the doorbell. |
Delete
Three hole back plate for weatherproof doorbell
The back plate with iii holes is non designed to provide a seal from atmospheric condition, considering the Video Doorbell it comes with is rated IP-54 weather resistant. For best installation, we recommend using the meridian and bottom mounting holes on a apartment surface.
For uneven or smaller surfaces, use the top and middle holes. Exist careful not to over tighten the centre screw. If a gap appears between the dorsum plate and the doorbell, loosen the center screw slightly.
Set a location to mount the Glimmer Video Doorbell
One time yous decide on proper placement, clean the surface well.
To adjust the view 5º upward-down, or 25º side-side, click to learn nigh installing a wedge or corner mount.
A newspaper template is included with your doorbell to show how far apart you drill the mounting holes. The template is shipped with the doorbell opening key fastened. Salvage the fundamental for time to come use. The aforementioned template works for Wedge and Corner Mounts.
How exercise I mount on vinyl siding?
To avert dissentious your vinyl siding, you may cull a mounting system other than the included mounting screws.
There are kits available to mountain a wireless doorbell on standard vinyl siding. Some skilful search terms are "surface block" and "vinyl siding wall plate".
If you lot are not using the mounting holes that are molded into the back plate, cover them with duct tape to keep out grit and water.
Delete
Should I install a Wedge or Corner Mount?
The wedge and corner mounts (included in some packages, or sold separately) can correct the doorbell view when the only available surface is angled, or you want to adjust the view.
- Wedge changes the view 5º up-down
- Corner Mountain changes the view 25º side-side.
The photographic camera in the doorbell has a field of view pointing straight out from the mounting surface. If the image does non capture the view you want, adding a wedge or corner mount can help. A Wedge offers 5° vertical tilt (upwardly and down), and a Corner Mount offers 25° horizontal tilt (side to side).
Click to visit the Amazon purchase folio for the Wedge and Corner Mountain accessories (external link, opens in a new browser window).
How to Install the Wedge or Corner Mountain
Cheque the doorbell view and placement past pressing the doorbell button, and then in the Blink app, tap the notification y'all receive to enter Alive View.
While in Live View, you are looking out of the doorbell photographic camera. You lot can adjust the position and location to get the view you lot want, earlier drilling into your wall.
The included drill template works for the mounts and the doorbell.
one. Drill mounting holes.
Record the template in place approximately 40 - 48 inches (102 -122cm) in a higher place the ground. If you want to employ the wiring from a doorbell you already have, place the template so that the wires will achieve through the key open expanse of the wedge.
2. Mountain accessory and so attach dorsum plate.
The Wedge and Corner Mount ship with a pair of shortened all-purpose screws. They are meant to be used to secure the back plate to the accessory ("two" in the image). Use the pointed, regular-length screws to secure the accessory to your wall or surface ("1" in the image). Come across diagram for more details.
| one. Regular length multi-purpose screws attach the Wedge or Corner Mount to your location through slots in the accessory. | 2. Shortened screws secure the back plate to attachment points molded into the Wedge and Corner Mountain. | Doorbell shown attached to Wedge and back plate. |
| | ||
Click for detailed instructions
ane. Use the longer pair of screws to secure the wedge or corner mount, showtime. Brand sure to put the screws through the slot openings as shown.
Wired installation details | |
| Back plate with screws | Back plate with opening |
| Attach i doorbell wire to each machine screw on the dorsum plate. Wire color is not a factor for this installation. If needed, ii extra screws are in the box. | Attach the back plate to the wedge or corner mountain, with the shorter pair of screws, included in the accessory packaging. |
| | |
| Adhere the back plate to the wedge or corner mount, with the shorter pair of screws, included in the accessory packaging. | Attach ane doorbell wire to each terminal screw on the doorbell. Wire color is not of import here. If needed, 2 extra screws are in the box. |
| | |
| Finally, use a two step motion to attach the doorbell to the back plate.
| Now, adhere the doorbell to the dorsum plate by lining up the top and pivoting down. Printing until you feel or hear a click and the doorbell is secure. |
Delete
iii. Attach the doorbell and examination.
Once the doorbell is in place, if it has already been set upwards, press the doorbell button and you will receive an warning notification. Tap the notification to see through the doorbell camera and make certain the view is what you want. If you have non fix the doorbell yet, visit Setting upwards your Blink Video Doorbell.
If you have set an Activity Zone or Privacy Zone, be enlightened of how they have been afflicted by the change in photographic camera view. Y'all may have to re-set the Activity or Privacy zones.
Click to larn more well-nigh Blink Video Doorbell Motion Detection.
Delete
How exercise I utilise wall anchors ?
The wall anchors are made of white plastic and are to be used when the threads of the screw cannot dig into the material, such as with brick. Y'all drill a hole big enough for the wall anchor to fit tightly into, then when you use the mounting screw, it's threads can hold deeply.
- Drill a 7/32-inch hole, ane inch (2.v cm) deep.
- Insert the wall ballast until it is affluent with the mounting surface.
- Continue with the installation.
Delete
Tools
Yous will need tape to hold the template in place, a screwdriver, a drill, and the clear plastic pouch with screws and wall anchors. To drill mounting holes, select the bit size yous need:
- Merely the screws: iii/32-inch (2.375 mm)
- Wall ballast: 7/32-inch (5.41 mm)
Delete
Tape the paper template 40 - 48 inches (102 - 122 cm) above the flooring.
Drill two guide-holes approximately ane inch deep (2.5 cm).
For mounting on brick, stucco, or drywall-type materials, you lot may want to employ the included white plastic wall anchors. Wall anchors requite the mounting screws a way to grip the threads and provide outward force per unit area against the walls of a drilled hole. Included wall anchors fit the pigsty from a 7/32-inch (5.41 mm) drill bit.
Remove the paper template.
Secure exposed wires if necessary.
If you are not using existing wires, but they are present, twist a grey final cap onto each exposed wire tip to preclude dangerous sparking or other issues. Find 2 terminal caps in the accessory bag with the mounting screws.
Attach the back plate to your surface with two screws (practise not over tighten)
All-purpose screws are included with two wall anchors and wire terminal cease caps in a clear plastic pouch. Employ two screws even if there are three holes in the back plate.
For a flat surface, use the top and bottom screws. For uneven or shorter mounting locations, employ the top and centre screw.

Note:The back plate with three mounting holes does non demand to grade a weather seal with the doorbell. IP-54 conditions resistance is provided past the battery cover.
Delete
Install is complete!
At present check your placement using Live View, or if your doorbell is in Event Response, press the ringer push, then tap the notification that appears in your mobile device.
To suit the view 5º up-downwardly, or 25º side-side, click to acquire virtually installing a wedge or corner mount.
Other install options
Sync Module
Using a Sync Module is strongly recommended to improve doorbell battery life. With our Sync Module 2, you can salve daily cloud backups onto a compatible USB wink drive, or save motion events and ringer button printing video clips without a subscription.
Wired to sixteen-24 vAC chime
Ring your existing chime when the doorbell is pressed, and apply on-demand alive view with two-way talk.
Click to visit the Blink Video Doorbell FAQ.
Delete
Outcome Response does not accept special mounting instructions.
- Use the provided template to set mounting pigsty locations.
- Attach the backplate to a flat surface.
- Attach the doorbell to its backplate.
- If doorbell camera view requires adjustment, click to learn about installing a wedge or corner mount.
Delete
Other Options
To improve the battery life of your Glimmer Video Doorbell and to have more features available, add a Sync Module to your arrangement, or connect to existing wiring from a doorbell.
With a Sync Module 2, you have the option to save clips from the doorbell onto a USB drive equally Local Storage without needing a Glimmer Subscription.
With a Blink Subscription (purchased through Amazon.com) you accept a range of features available to cover either one camera or the entire business relationship. Click for more than information on subscriptions and pricing.
Delete
How to add and connect a Sync Module to your doorbell
Information technology is easiest to add the doorbell in Outcome Response to a Sync Module in the post-obit steps.
- Add a Sync Module to your account.
- Select the existing doorbell system when yous are asked to choose.
- Follow the app instructions to join the Sync Module with the doorbell.
Add together a Sync Module
i. From the abode screen, tap the Add Device + icon.
two. The Add Device screen displays your device options.
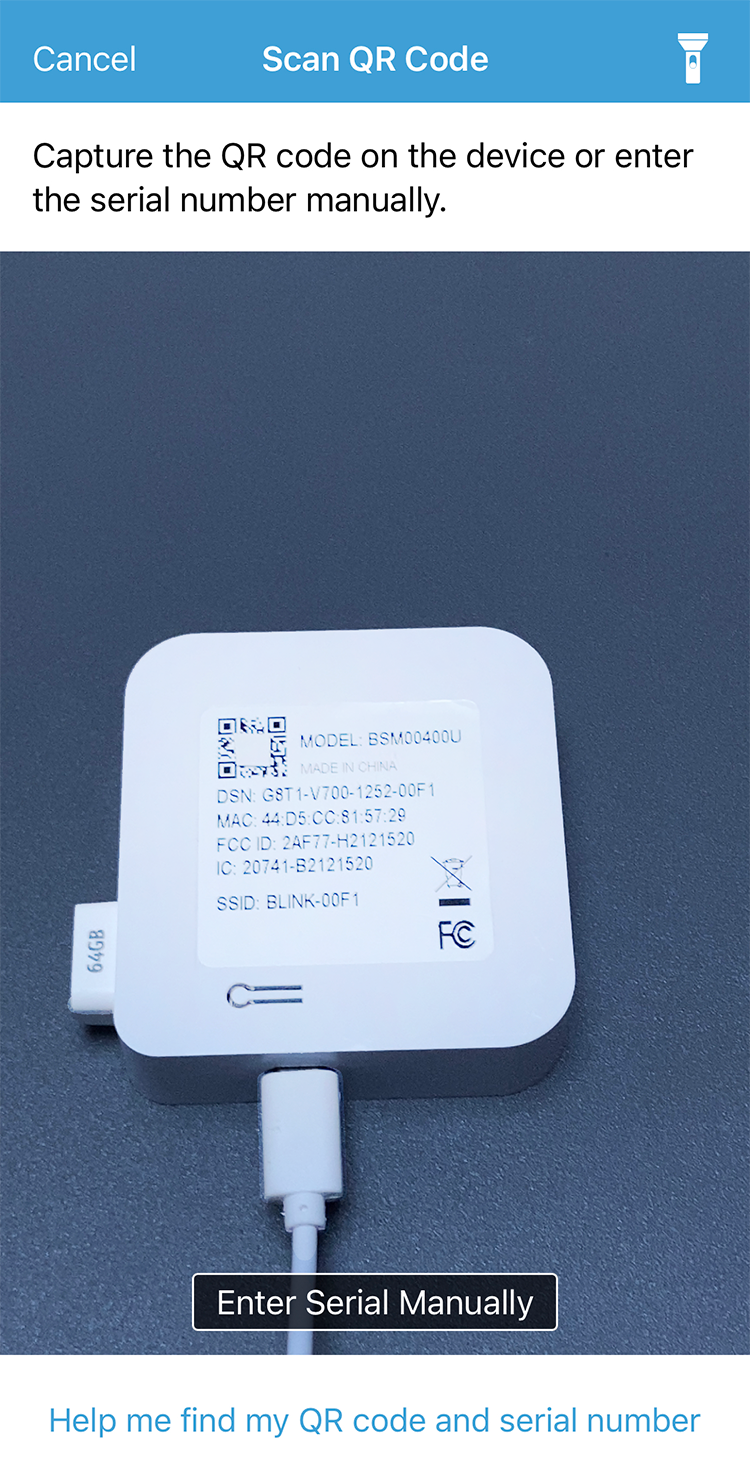
iii. The series number is also printed as a QR code. To scan a QR code, the Blink app requires permission to access the camera on your mobile device.
If the admission request appears, tap "OK" to let the Blink app to scan the QR code, automatically entering the series number. If you prefer, you lot can deny access to the camera by borer "Don't Permit" and enter the serial number manually.
Browse the QR code on the back of the Sync Module. To learn where the QR code and serial number are, tap the "Help me detect my QR code and series number" link at the lesser of the Scan QR Lawmaking screen.
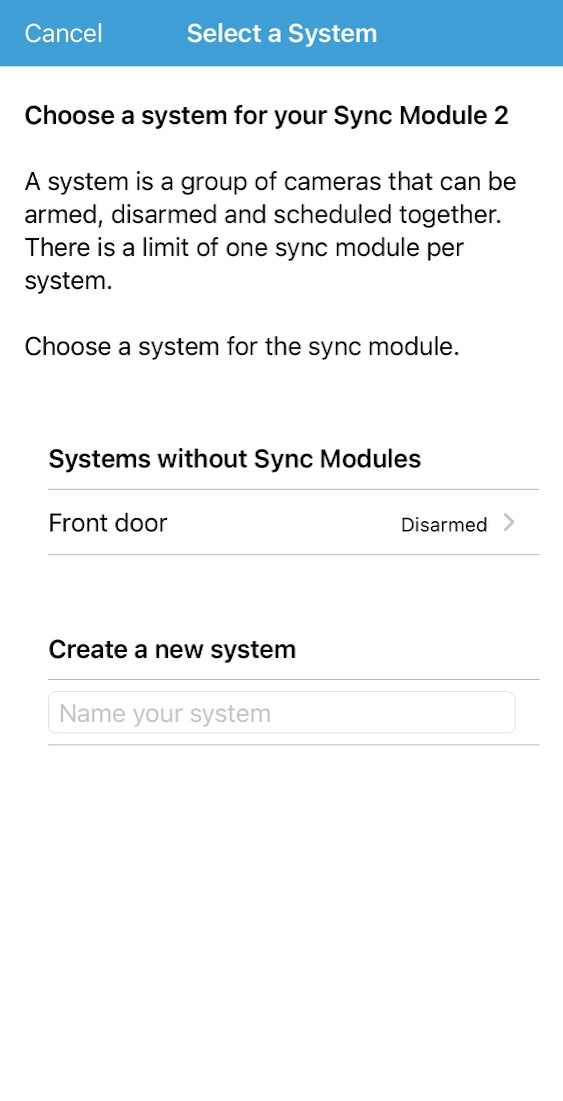
When the Sync Module is recognized, a dark-green square appears. You are asked to choose a system, or create a new i. Notice if your doorbell organisation is included in the "Systems without Sync Modules". Standalone Mini cameras volition as well appear hither.
Choose your existing doorbell system
When the doorbell was installed, you created a name for its system. Choose the doorbell system when asked.
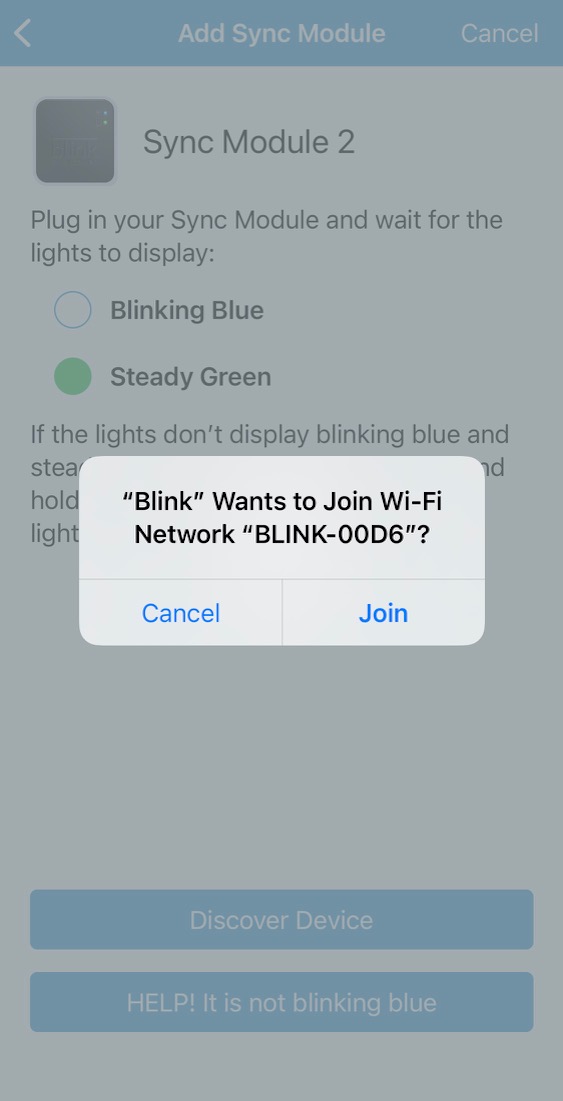
Afterwards you select the doorbell system, the app shows you what the Sync Module looks like when information technology is ready to ready. Expect for the blinking Bluish LED and a solid Greenish LED, and if the pattern is displayed, tap "Discover Device". If yous do not see the pattern, click to learn near the Sync Module Reset Button.
Next, a popup requests permission to bring together the network created by the Sync Module. Tap "Bring together".

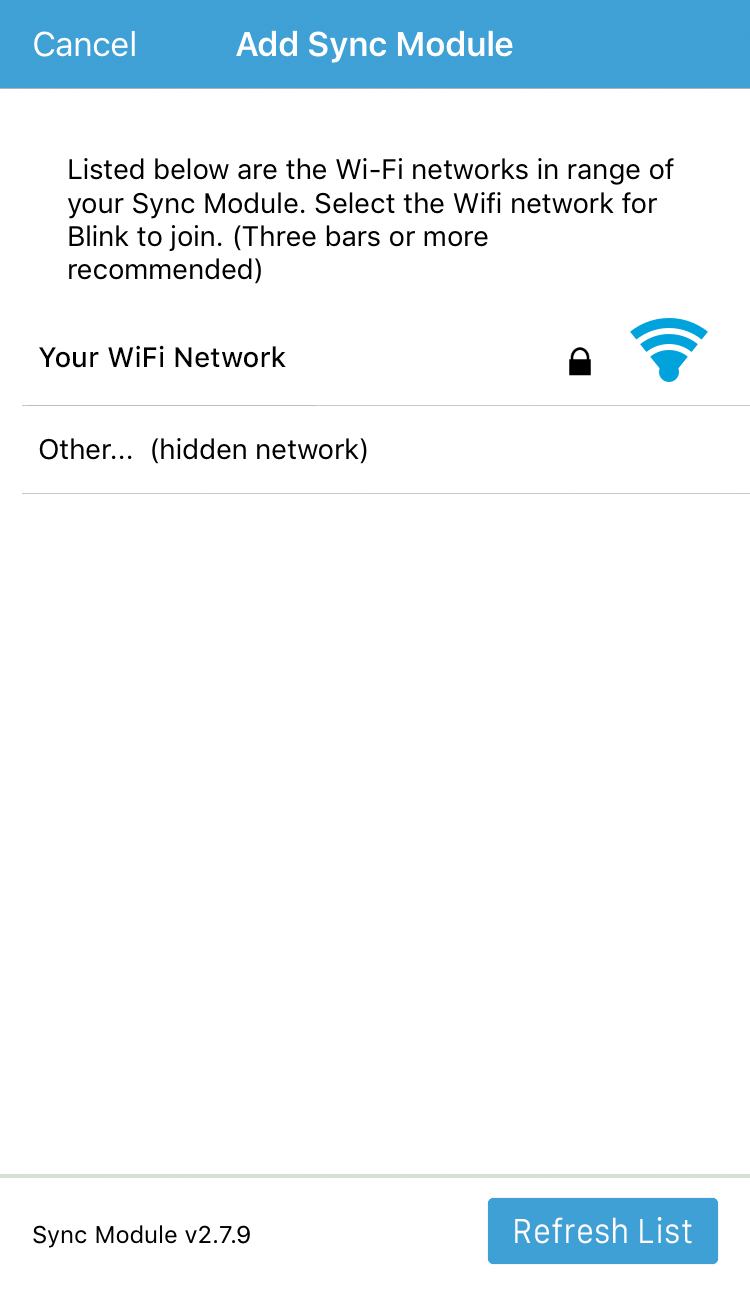
When the Sync Module is joined, you are presented with a screen of two.4Ghz Wi-Fi networks within range. Tap your network name.
When you tap your Wi-Fi network name, you are presented with a password entry field. Ensure that your password is right before you enter information technology. Wrong password is a common crusade of difficulty getting started. Tap"Join" on your keypad to continue.

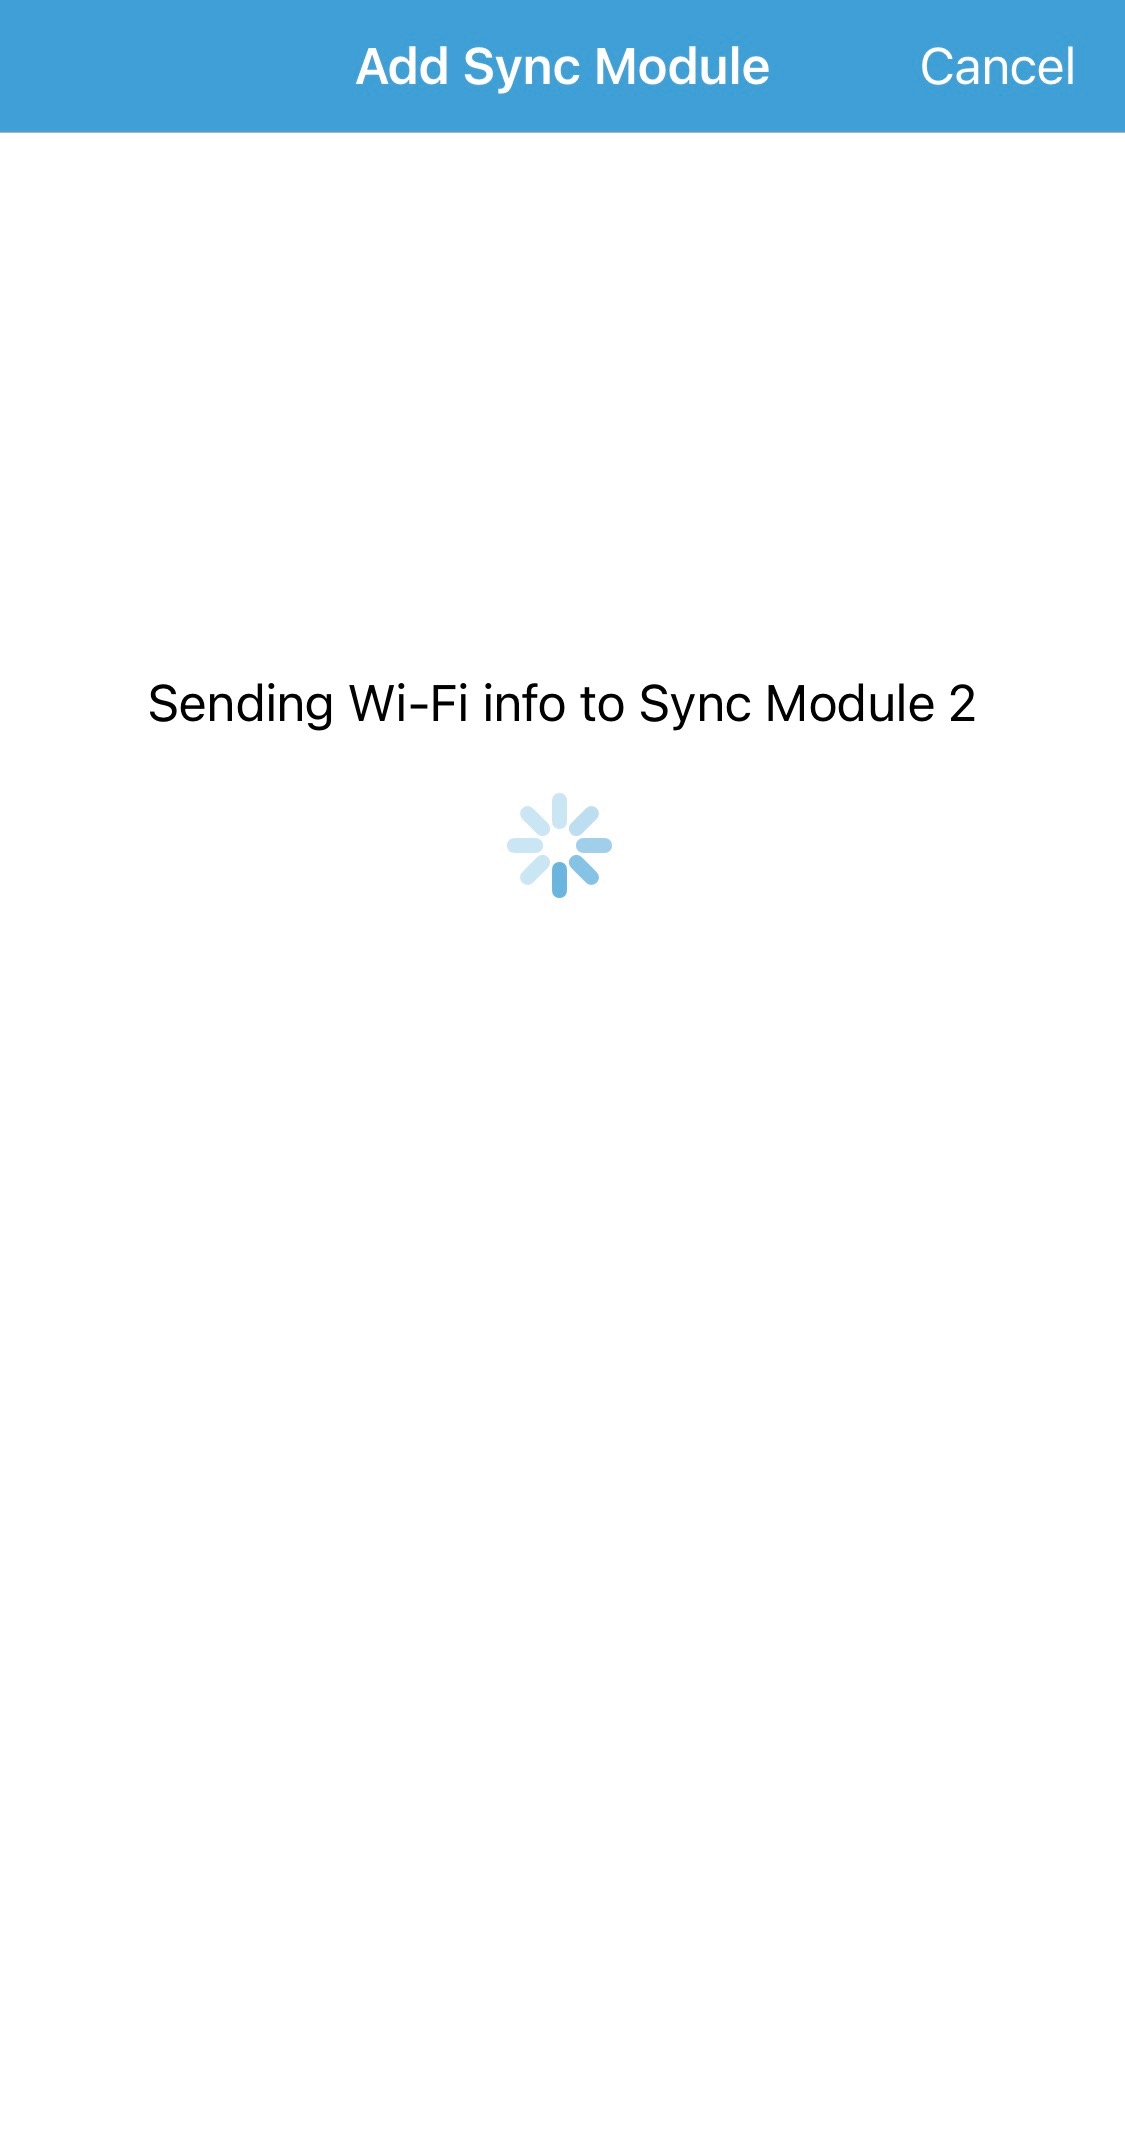
While your Sync Module is being connected to your Wi-Fi network and so to the Blink servers, you are shown a waiting screen.

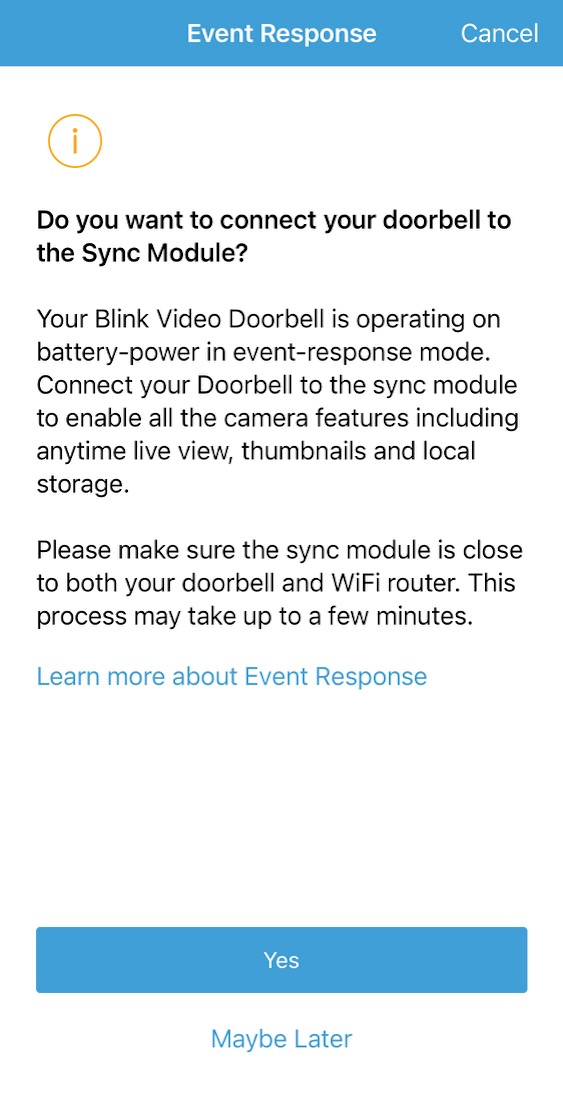
When Sync Module installation is complete, y'all are asked if you lot want to connect your doorbell to this new sync Module. Tap "Yes".
When your doorbell is in Upshot Response, information technology goes into a sleep fashion 60 seconds subsequently an event. To download the new settings and complete the Sync Module setup, press the doorbell button as the next screen requests.
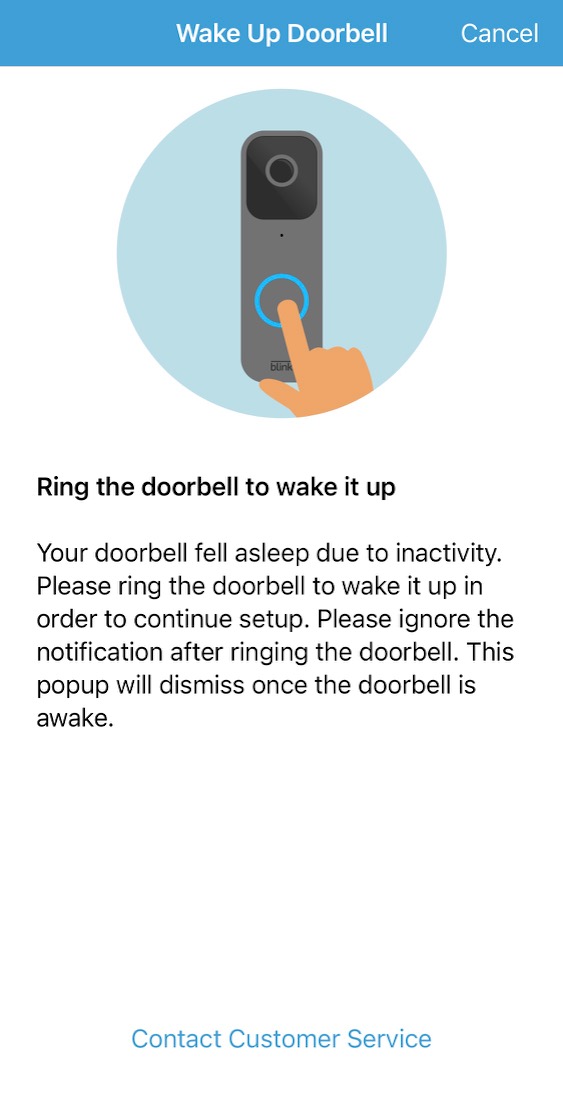
After you press the doorbell push button, the post-obit screens appear to evidence activity and then completion. Tap "Done" when you see "Sync Module 2 added to <your-system-proper name> system!" and y'all should be returned to the Habitation Screen.


Possible Error Messages
If calculation a Sync Module does not complete as described, the following fault messages might announced.

This screen appears after an unsuccessful attempt to join the Wi-Fi network.
To make sure the doorbell is ready for connectedness, remove and replace the batteries to restart the blinking Red LED.
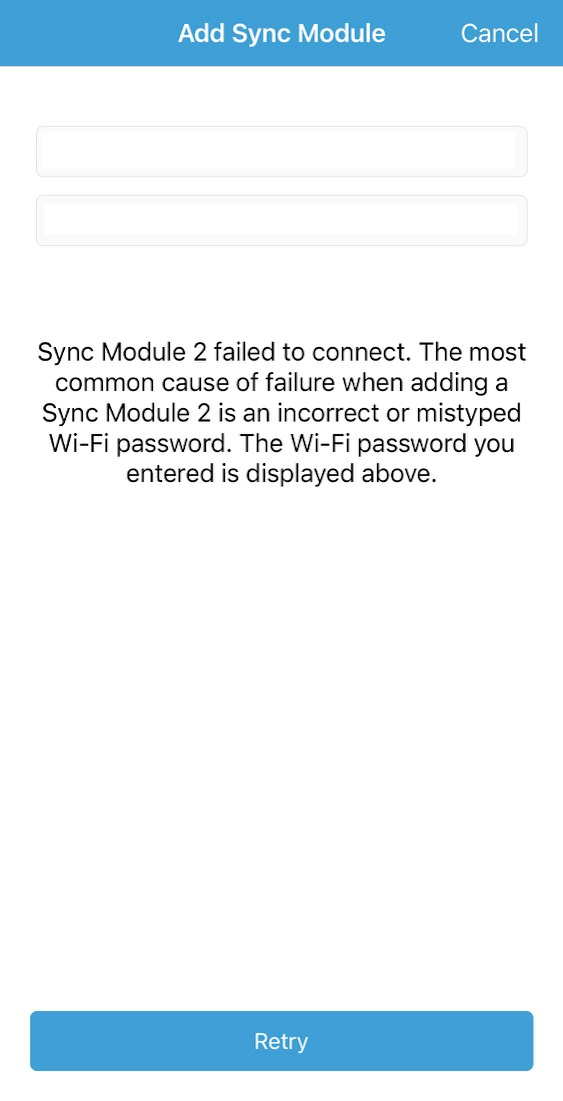
This screen may appear if the Wi-Fi countersign was entered incorrectly. Make certain you lot have the correct countersign, and tap "Retry" to attempt to connect over again.
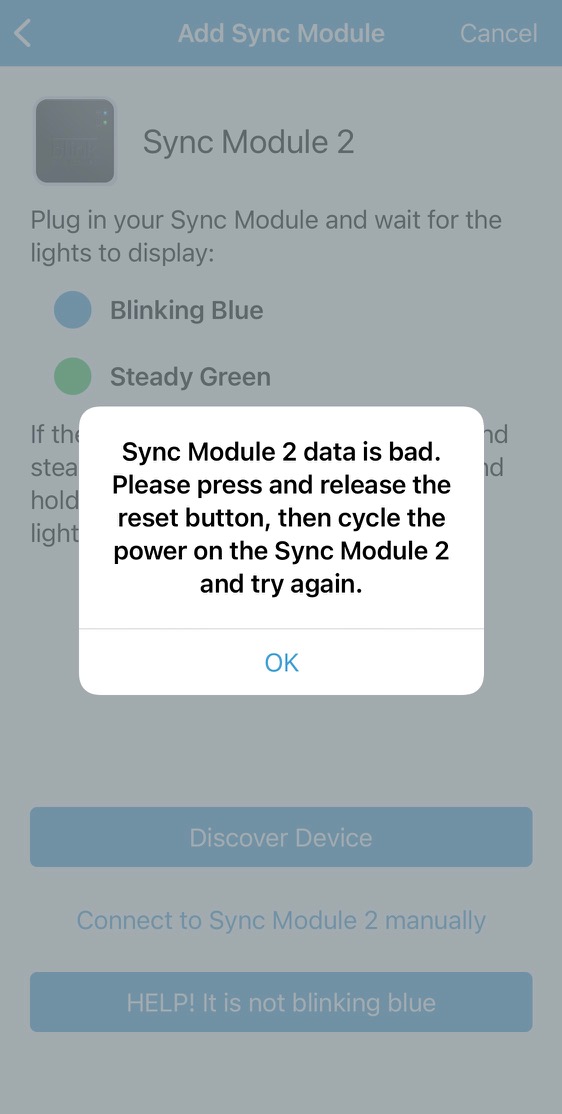
This screen may appear if you lot have already installed your Sync Module and tried to delete it in order to add it to the doorbell system. Follow the instructions to reset your Sync Module and prepare to install it once more.
Delete
Source: https://support.blinkforhome.com/blink-video-doorbell-informationen/using-the-blink-video-doorbell-with-a-sync-module
0 Response to "How To Set Up Blink Video Doorbell"
Post a Comment